
Professional LED lighting
LED Strip Profiles: Aluminium Channels for 8mm, 10mm and 15mm Tape
62 products
The profile is not decorative — it is the heatsink that decides whether your LED strip lasts three years or fifteen. UK LED Lights stocks the full 2026 range of aluminium LED strip profiles at our Telford warehouse: s...
Read more Show less
The profile is not decorative — it is the heatsink that decides whether your LED strip lasts three years or fifteen. UK LED Lights stocks the full 2026 range of aluminium LED strip profiles at our Telford warehouse: surface mount, recessed plaster-in, 45-degree corner, and suspended pendant channels, in 1-metre, 2-metre, and 3-metre lengths, with milky and clear diffuser options, end caps, mounting clips, and joining connectors. Every profile is anodised aluminium — corrosion-resistant, thermally efficient, and ready to cut to length on site.
Our LED strip profile collection covers channel widths from 10mm to 15mm to match every strip on the market, milky diffusers that eliminate visible LED dots entirely, and clear diffusers that preserve maximum brightness for task-critical applications. Need help matching a profile to your strip width and mounting method? Call 01952 370008 or email sales@ukledlights.co.uk — our technical team has specified profiles for thousands of UK installations since 2020.
Surface Mount · Recessed · Corner 45° · Suspended · 10mm · 12mm · 15mm Channel · Milky Diffuser · Clear Diffuser · 1m · 2m · 3m Lengths · Anodised Aluminium · End Caps · Mounting Clips · Joiners · Free UK Delivery
Quick decision — which LED strip profile do you need?
- Kitchen under-cabinet lighting: Slim surface-mount profile with milky diffuser — fixes to the underside of wall units with mounting clips, hides every LED dot, and acts as a heatsink to protect adhesive and chips from cooking heat.
- Ceiling cove or plasterboard recess: Recessed plaster-in profile — sits flush with the finished surface, diffuser visible only as a clean light line, no protruding edges.
- Inside corner where two surfaces meet: 45-degree corner profile — fits wall-ceiling junctions, inside cabinet corners, and shelving returns where a flat profile cannot sit.
- Suspended linear pendant over a kitchen island or desk: Suspended profile with wire-hang kit — produces a floating light line at any drop height.
- Curved or irregular surface: Consider a silicone profile instead of rigid aluminium — flexible enough to follow bends that would require multiple cuts and joiners in aluminium.
Who LED strip profiles are for: Electricians, kitchen fitters, interior designers, and homeowners who want a finished, professional-quality LED strip installation — not bare tape stuck to a surface. If you are installing strip lighting in any location where the strip is visible to the occupant, or where heat management matters for longevity, a profile is not optional. It is the difference between a three-year bodge and a fifteen-year installation.
Who LED strip profiles are NOT for: If your strip is completely hidden — behind a pelmet, above a wardrobe top, or inside a sealed void where nobody will ever see it and airflow keeps temperatures low — a profile adds cost without meaningful benefit. If you need a thick, glowing neon-style light line rather than a slim architectural channel, our LED neon flex range is designed for that purpose.
Common buying mistakes to avoid:
- Buying a profile without checking channel width: A 10mm-wide channel will not accept a 12mm or 15mm strip — the strip physically will not fit, or it will buckle and lift inside the channel. Measure your strip width first. Every product listing on UK LED Lights states the compatible strip width.
- Skipping the profile entirely to save money: LED strip stuck directly to a plasterboard ceiling or MDF shelf has no heatsink. Junction temperatures rise, the 3M adhesive softens within months, the strip sags or falls, and LED lifespan drops by 40–60 percent compared to a properly heat-sinked installation.
- Mounting strip directly onto bare metal without a profile: Exposed copper pads on the back of LED strip will short-circuit against uninsulated metal surfaces. An anodised aluminium profile provides the insulating barrier — bare steel, bare copper pipe, or untreated aluminium angle does not.
- Using clear diffuser where dot visibility matters: Clear diffusers preserve roughly 95 percent of light output but do almost nothing to hide individual LED dots. If you are using SMD strip and want a clean light line, milky is the only diffuser that works. With COB strip, the dots are already invisible — clear diffuser is a valid choice.
- Forgetting end caps and joiners: Open profile ends collect dust, insects, and moisture. Closed end caps seal the channel. Open end caps allow cable exit. Joining connectors link two profile lengths into one continuous run without a visible gap.
Why does LED strip need an aluminium profile?
An aluminium LED strip profile serves three critical functions: it acts as a passive heatsink that draws heat away from the LED chips, it protects the strip from physical damage and dust, and it holds a diffuser that controls light distribution and dot visibility. Without a profile, LED strip runs hotter, fails sooner, and produces a visibly inferior light line in any exposed installation.
Heat is the primary killer of LED strip. Every LED chip converts a portion of its input power into heat rather than light. In a well-designed installation, that heat transfers through the strip's flexible PCB, into the aluminium channel body, and dissipates across the profile's surface area into the surrounding air. The aluminium acts as a continuous heatsink along the entire length of the strip.
Stick the same strip directly onto plasterboard, timber, or MDF — materials with poor thermal conductivity — and the heat has nowhere to go. Junction temperatures rise, phosphor degrades faster, and the 3M adhesive bond weakens as temperatures exceed its rated threshold. The practical consequences in a 2026 installation:
- Lifespan reduction: LED strip mounted without a heatsink typically loses 40–60 percent of its rated lifespan. A strip rated for 50,000 hours in a profiled installation may deliver only 20,000–30,000 hours on bare plasterboard before noticeable brightness decay.
- Adhesive failure: 3M VHB tape is rated to approximately 90°C. Strip running at high output on a non-conductive surface regularly exceeds this threshold at the adhesive interface. The strip peels, sags, or drops — one of the most common complaints in cheap LED installations.
- Colour shift: Sustained heat accelerates phosphor degradation in white LEDs. A warm white strip that started at 3000K may drift towards 3500K or higher within 12–18 months without adequate cooling — visible and unacceptable in any kitchen or hospitality setting.
- Physical protection: Exposed strip is vulnerable to accidental contact, cleaning products, condensation, and dust ingress. A profile with diffuser and end caps creates a sealed, protected housing — particularly important in kitchens where grease-laden air settles on every surface.
The cost of an aluminium profile is typically 15–25 percent of the total strip installation cost. The cost of replacing a failed strip installation — including labour to remove, clean, re-mount, and re-wire — is 100 percent of the original cost plus the inconvenience. For any 2026 installation where the strip is visible or the environment is warm, a profile is not an upgrade. It is a requirement.
What types of LED strip profile are available?
The four main types of aluminium LED strip profile are surface mount (fixed to the face of a surface), recessed or plaster-in (embedded flush into plasterboard or timber), 45-degree corner (designed for wall-ceiling junctions and internal corners), and suspended (hung from cables to create a floating linear pendant). Each type solves a different mounting problem and produces a distinct visual result.
Surface mount profiles
- Mounting method: Fixed directly to the face of a wall, ceiling, shelf underside, or cabinet interior using mounting clips or adhesive tape.
- Visible result: The profile sits proud of the surface by a few millimetres. The diffuser faces the viewer. The aluminium body is visible from the side.
- Best applications: Under-cabinet kitchen lighting, shelf accent lighting, wardrobe interiors, retail display units, staircase handrail underlighting.
- Why choose it: Simplest installation — no routing, no plastering, no structural modification. Clips screw into place, profile clicks in, strip mounts inside.
Recessed and plaster-in profiles
- Mounting method: Set into a routed channel in timber, a plasterboard slot, or a purpose-built recess. Flanges sit flush with the finished surface. Plaster or filler covers the flange edges.
- Visible result: Only the diffuser is visible — a clean light line flush with the surrounding surface. No protruding aluminium, no shadow lines.
- Best applications: Ceiling cove lighting, wall-wash feature lines, custom joinery with integrated lighting, high-end kitchen pelmets, commercial reception desks.
- Why choose it: The cleanest possible finish. Specifiers and interior designers use recessed profiles for architectural lighting where the light source should be invisible — only the light itself is seen.
45-degree corner profiles
- Mounting method: Sits into the 90-degree junction where two surfaces meet — typically wall-to-ceiling or wall-to-wall internal corners. Mounting clips or adhesive hold the profile in place.
- Visible result: The diffuser faces outward at 45 degrees, washing both adjacent surfaces with light. The profile body is hidden in the corner junction.
- Best applications: Wall-ceiling cove lighting, inside cabinet corners, display case internal edges, under-step nosing where wall meets tread.
- Why choose it: No other profile type sits properly in a 90-degree junction. A flat surface-mount profile in a corner either leaves a gap behind it or requires packing — the corner profile is purpose-shaped for this geometry.
Suspended profiles
- Mounting method: Hung from ceiling fixings using steel wire suspension kits. Available at adjustable drop heights.
- Visible result: A floating linear light line — visible from all sides if using a wrap-around diffuser, or directional if using a downward-facing channel.
- Best applications: Kitchen island pendant lighting, office desk task lighting, retail aisle lighting, restaurant table illumination.
- Why choose it: Creates a modern linear pendant fixture at a fraction of the cost of a purpose-built LED pendant. The strip, profile, and suspension kit together often cost less than a single branded pendant fitting of equivalent length.
| Profile Type | Mounting | Visible Elements | Best Room | Installation Complexity |
|---|---|---|---|---|
| Surface mount | Clips or adhesive to face of surface | Full profile body + diffuser | Kitchen, shelving, retail | Low — no structural work |
| Recessed / plaster-in | Set into routed or plastered channel | Diffuser only — flush finish | Ceilings, custom joinery, commercial | Medium — requires routing or plastering |
| 45-degree corner | Clips or adhesive into 90° junction | Diffuser face at 45° | Cove lighting, cabinet corners | Low — purpose-shaped for corners |
| Suspended | Wire-hung from ceiling | Full profile — viewed from below | Kitchen island, office, restaurant | Medium — ceiling fixings required |
How do you choose the right channel width for your strip?
Measure the width of your LED strip in millimetres and select a profile with an internal channel width that matches or very slightly exceeds it. The three standard channel widths in 2026 are 10mm, 12mm, and 15mm. A strip that is too wide will not fit into the channel. A strip that is significantly narrower will shift sideways inside the profile, producing an uneven light line through the diffuser.
Every LED strip product on the UK LED Lights website states its exact width in millimetres. The most common pairings in current stock:
- 8mm-wide strip: Fits into a 10mm channel. The 2mm clearance allows easy insertion and removal without lateral movement visible through the diffuser.
- 10mm-wide strip: Fits into a 10mm or 12mm channel. A 10mm channel gives a snug fit with minimal lateral play — the preferred option for most installations. A 12mm channel works but allows slight side-to-side movement.
- 12mm-wide strip: Requires a 12mm or 15mm channel. This is the most common width for high-output COB LED strip and standard SMD 5050 RGB strip. A 10mm channel will not accept it.
- 15mm-wide strip: Requires a 15mm channel. Typically found in RGBW, RGB CCT, and high-density specialist strips with wider PCBs.
The practical rule: if in doubt, go one size up rather than one size down. A strip that is 0.5mm too wide for a channel will buckle, lift off the adhesive backing, and create hotspots where it presses against the aluminium sidewall. A strip that is 1–2mm narrower than the channel sits flat and functions correctly — the diffuser hides any minor lateral offset from the viewer.
If you are ordering strip and profiles together, contact our technical team on 01952 370008 and we will confirm compatibility before dispatch. Getting the width match right costs nothing. Getting it wrong costs a return, a re-order, and a delayed installation.
What is the difference between milky and clear diffusers?
A milky diffuser scatters light across its full surface, hiding individual LED dots and producing a smooth, even glow — at the cost of approximately 15–30 percent light transmission. A clear diffuser transmits approximately 95 percent of the strip's output with no dot-hiding effect, preserving maximum brightness but leaving every individual LED chip visible through the cover.
The choice between milky and clear depends entirely on two factors: the strip technology you are using, and whether the diffuser is in the occupant's line of sight.
- COB strip + milky diffuser: The premium combination for 2026 installations. COB strip is already dot-free, so the milky diffuser adds an extra layer of softness without solving a problem that exists. The 15–30 percent brightness reduction is the trade-off. Best for ambient and accent lighting where soft diffusion matters more than raw output.
- COB strip + clear diffuser: Maximises brightness from a strip that is already dot-free. The clear cover protects from dust and contact without reducing output. Best for task lighting — kitchen worktops, display cases, workbenches — where every lumen counts.
- SMD strip + milky diffuser: The minimum acceptable combination when SMD strip is visible to the occupant. Without the milky diffuser, individual LED dots reflect off every glossy surface within range. The milky cover reduces dot visibility by approximately 70–80 percent — a visible improvement, though not as uniform as COB.
- SMD strip + clear diffuser: Only appropriate when the profile is hidden from direct view and maximum brightness is the priority. Behind a pelmet, inside a void, or above a cabinet where nobody looks directly at the strip.
| Combination | Dot Visibility | Light Output | Best Application |
|---|---|---|---|
| COB + milky diffuser | Zero dots — soft even glow | Approximately 70–85% of rated output | Living rooms, bedrooms, hospitality ambient |
| COB + clear diffuser | Zero dots — crisp bright line | Approximately 95% of rated output | Kitchen task, retail display, workbench |
| SMD + milky diffuser | Reduced — dots softened but faintly visible at close range | Approximately 70–85% of rated output | Budget visible installations, shelving |
| SMD + clear diffuser | Fully visible individual dots | Approximately 95% of rated output | Hidden locations only — pelmets, voids |
Replacement diffusers are available separately if you want to test both options before committing, or if a diffuser is damaged during installation. All UK LED Lights profiles use a click-in diffuser system — no adhesive, no screws, and swappable in seconds.
How do you install an aluminium LED strip profile step by step?
Installing an aluminium LED strip profile requires measuring and cutting the profile to length, fixing mounting clips to the surface, clicking the profile into the clips, applying the LED strip inside the channel, connecting the wiring, and fitting the diffuser and end caps. A typical under-cabinet kitchen run takes 20–40 minutes per metre with basic hand tools.
- Step 1 — Measure and mark the mounting surface: Use a tape measure and spirit level to mark the exact run length and position. For under-cabinet installations, position the profile towards the front edge of the cabinet — lighting the worktop rather than the wall. For ceiling cove installations, mark the profile position to ensure even spacing from the wall edge. Account for any obstacles such as hinges, brackets, or cable exits.
- Step 2 — Cut the profile to length: Mark the cut line on the aluminium channel with a fine-tip marker. Cut with a hacksaw fitted with a 32-TPI blade, or a mitre saw with a non-ferrous metal blade for cleaner results. Deburr both cut edges with a fine file or 240-grit sandpaper — sharp aluminium edges will damage the strip and cut fingers. Cut the diffuser separately with a sharp craft knife or fine-tooth saw, 1–2mm shorter than the profile to allow end cap fitment.
- Step 3 — Fix mounting clips to the surface: Space mounting clips at 300–400mm intervals along the marked line. Pre-drill pilot holes if fixing into hardwood, MDF, or masonry. For plasterboard ceilings, use suitable cavity fixings rated for the combined weight of the profile, strip, and diffuser. Ensure all clips are aligned — a misaligned clip creates a visible kink in the finished light line.
- Step 4 — Click the profile into the mounting clips: Start at one end and press the profile body down into each clip until it snaps into place. The profile should sit firmly without lateral movement. If any clip is too tight or too loose, adjust its position before proceeding — forcing the profile will bend the aluminium.
- Step 5 — Apply the LED strip inside the channel: Peel back approximately 100mm of the 3M adhesive backing at a time and press the strip firmly into the base of the channel. Do not peel the entire backing at once — the strip will stick to itself and become unusable. Ensure the strip sits flat and centred with no twists, buckles, or edge lifting. For LED strip lights wider than 10mm, confirm the channel width accepts the strip before applying adhesive.
- Step 6 — Make wiring connections: Connect the strip to the LED driver using soldered joints or push-fit strip connectors. Route the cable through an open end cap at one or both ends of the profile. If the cable exits mid-run (for example, feeding from a ceiling void into a recessed profile), drill a small cable exit hole in the profile body before mounting — drilling after strip installation risks damaging the LEDs.
- Step 7 — Test before fitting diffuser and end caps: Power on the strip and check for full, even illumination along the entire run. Look for any dark sections (loose connection), flickering (driver mismatch or damaged strip section), or uneven brightness (voltage drop on long runs). It is far easier to fix a wiring issue before the diffuser is in place than after.
- Step 8 — Fit the diffuser: Starting at one end, press the diffuser into the profile channel edges. It should click into place with firm finger pressure — no tools required. Work along the length in 200–300mm increments. If the diffuser resists, check that the strip is sitting flat and not protruding above the channel walls.
- Step 9 — Fit end caps: Press closed end caps onto any profile ends where no cable exits. Press open end caps (with cable slot) onto ends where the power cable exits. End caps friction-fit into the profile — apply a small drop of clear silicone adhesive if the fit is loose in a high-vibration or commercial environment.
- Step 10 — Final inspection: Power on again and inspect the finished installation from the occupant's normal viewing position. Check for even light distribution, no visible hotspots through the diffuser, no light leaks at end cap joints, and secure mounting with no movement when touched. Clean the diffuser surface with a soft dry cloth to remove fingerprints from installation.
If you are joining two profile lengths end-to-end for a continuous run, use a dedicated profile joining connector — this slides inside both channel ends and holds them in precise alignment. A visible gap or step between two profile sections is one of the most obvious signs of an amateur installation. For project advice or bespoke cutting, call 01952 370008.
Which profile type suits each room and application?
The right profile type depends on the mounting surface, the desired visual result, and whether the installation is residential or commercial. Surface mount profiles suit kitchens and shelving where speed matters. Recessed profiles suit high-end ceilings and custom joinery. Corner profiles solve wall-ceiling junctions. Suspended profiles replace traditional pendant fittings over islands and desks.
- Kitchen under-cabinet: Slim surface-mount profile with milky diffuser. Position the profile towards the front edge of the wall unit so the light falls onto the worktop, not the splashback. Pair with COB LED strip in 3000K warm white for the cleanest result — this is the standard specification for professional kitchen installations across the UK in 2026.
- Bathroom mirror or vanity surround: Surface-mount profile in IP-rated housing where available, or standard profile in dry Zone 2 areas only. Always check BS7671 bathroom zone requirements before specifying a mounting position. Use 4000K natural white for accurate colour rendering at the mirror.
- Living room ceiling cove: Recessed plaster-in profile for new-build or renovation projects where the plasterer can form the recess. Surface-mount profile behind a shadow-gap detail or coving for retrofit projects where plasterboard cutting is not practical.
- Bedroom headboard recess: Recessed profile set into a routed channel in the headboard panel. Milky diffuser, warm white 2700K, on a trailing-edge dimmer for full brightness control from reading level down to ambient glow.
- Staircase — under-nosing or handrail: Slim surface-mount profile fixed to the underside of each tread nosing or along the handrail underside. Individual short lengths per tread, or one continuous run along a handrail. 3000K or 2700K warm white — cool white on staircases creates a clinical atmosphere that most homeowners reject within weeks.
- Retail display and shopfitting: Surface-mount inside display cases, recessed into shelving units, or suspended over counter displays. Clear diffuser for maximum product illumination. 4000K natural white is the retail standard — warm enough to be inviting, cool enough to render product colours accurately.
- Commercial office or reception: Suspended profile over desks for task lighting, or recessed profiles in ceiling details for ambient architectural lighting. 4000K natural white meets most commercial lighting specifications and avoids the fatigue associated with 6500K cool white in prolonged-use environments.
- Garage, workshop, or utility: Surface-mount profile with clear diffuser for maximum output. These are functional spaces where light quality takes priority over aesthetics. Cool white 5000K–6500K provides the highest perceived brightness for detail work.
What accessories do you need for a complete profile installation?
A complete LED strip profile installation requires the aluminium channel, a diffuser (milky or clear), end caps (open for cable exit, closed for sealed ends), mounting clips, and optionally joining connectors for multi-length runs. The strip, driver, dimmer, and controller are separate items — the profile system is the housing and heatsink only.
- Mounting clips: Typically supplied with the profile or available separately. Space at 300–400mm centres. Spring-steel clips grip the profile body and screw to the mounting surface. Essential for surface-mount and corner profiles — recessed profiles are held by the plaster or routed channel.
- End caps — closed: Seal the profile end where no cable exits. Prevent dust, insects, and moisture entering the channel. Friction-fit into the profile. One pair (left and right) per profile length.
- End caps — open: Feature a slot or hole for the power cable to exit the profile cleanly. Use at the feed end of every run, or at both ends for centre-fed installations.
- Joining connectors: Internal aluminium sleeves that slide inside two profile ends, holding them in precise alignment for continuous multi-length runs. Critical for installations longer than 3 metres — the maximum single-length profile available.
- Diffuser — milky: Click-fit opal polycarbonate cover. Hides LED dots, softens output, reduces transmitted brightness by approximately 15–30 percent.
- Diffuser — clear: Click-fit transparent polycarbonate cover. Protects the strip from dust and contact. Transmits approximately 95 percent of output. No dot-hiding effect.
- Suspension kits (suspended profiles only): Steel wire and ceiling rosette kits. Adjustable drop height. Typically two suspension points per metre of profile length for stable, level hanging.
Browse the full range of LED strip accessories including connectors, extension cables, and controllers. If you are ordering profiles and strip together, email sales@ukledlights.co.uk with your project details and we will confirm every component you need before dispatch — no missing parts, no second orders, no delayed installations.
Can you cut aluminium LED profiles to custom lengths on site?
Yes — aluminium LED strip profiles are designed to be cut to exact length on site using a standard hacksaw with a 32-TPI blade or a mitre saw with a non-ferrous metal cutting disc. The anodised aluminium cuts cleanly and does not require specialist tools. Diffusers are cut separately with a fine-tooth saw or sharp craft knife. Always cut the profile and diffuser before mounting the LED strip inside.
- Hacksaw method: Clamp the profile in a vice with soft jaws (or wrap in cloth to prevent scratching the anodised finish). Mark the cut line with a fine-tip marker. Cut with slow, even strokes using a 32-TPI hacksaw blade — fine teeth prevent the aluminium from snagging. Deburr both edges with a fine flat file and 240-grit sandpaper.
- Mitre saw method: Faster and cleaner for multiple cuts. Use a non-ferrous metal blade (typically carbide-tipped with a negative rake angle). Clamp the profile firmly in the mitre saw fence. Cut in a single pass — do not force the blade. Deburr as above.
- Diffuser cutting: Score the diffuser with a sharp craft knife and snap along the score line, or cut with a fine-tooth junior hacksaw. Cut the diffuser 1–2mm shorter than the profile length to allow end cap fitment without compression.
- Available lengths: UK LED Lights stocks profiles in 1-metre, 2-metre, and 3-metre standard lengths. For installations longer than 3 metres, join multiple lengths with internal joining connectors. For installations under 1 metre, cut a 1-metre profile down to your exact measurement — there is no minimum length.
If you prefer profiles pre-cut to your exact specification, call 01952 370008 with your measurements. Our warehouse team can cut and prepare profiles before dispatch for large orders or commercial projects where on-site cutting is not practical.
How do LED strip profiles improve light quality and lifespan?
An aluminium profile improves LED strip performance in three measurable ways: it reduces LED junction temperature by 10–20°C through passive heatsinking, it holds the diffuser that controls beam spread and dot visibility, and it maintains consistent strip alignment over the full run length — preventing the twists, sags, and adhesive failures that degrade light output in unhoused installations.
- Thermal management: Aluminium has a thermal conductivity of approximately 205 W/m·K — roughly 1,000 times higher than plasterboard (0.16 W/m·K). When LED strip is mounted inside an aluminium channel, heat transfers from the PCB into the profile body and dissipates across its full surface area. Junction temperatures drop by 10–20°C depending on strip wattage and ambient conditions. Lower junction temperatures directly translate to longer phosphor life, slower lumen depreciation, and more stable colour temperature over the installation's service life.
- Adhesive bond integrity: The aluminium channel provides a flat, stable mounting surface that the 3M adhesive bonds to reliably. The heatsinking effect keeps adhesive temperatures below the rated threshold. On non-conductive surfaces, adhesive softening and strip detachment is the single most common failure mode — profiles eliminate it entirely.
- Optical consistency: A profile holds the strip in a fixed, straight line from end to end. No sagging, no twisting, no lateral drift. The diffuser sits at a consistent distance from the LED surface along the entire run, producing even brightness and uniform colour mixing — particularly important for RGB and RGBW installations where uneven chip-to-diffuser distance creates visible colour banding.
- Dust and impact protection: The diffuser and end caps create a sealed housing around the strip. Dust accumulation on exposed LED chips reduces output by 5–15 percent over 12 months in typical residential environments. In commercial kitchens, grease accumulation is worse. A sealed profile with diffuser keeps the strip clean and at full output for years without maintenance.
The evidence is consistent across every independent LED lifespan study published since 2020: heatsinking is the single most effective way to extend LED strip service life. A well-profiled installation running at moderate output will typically still be producing 80 percent of its original brightness at the 50,000-hour mark — well beyond a decade of normal residential use.
Why do UK electricians and designers choose UK LED Lights for profiles?
UK LED Lights supplies LED strip profiles from our own warehouse in Telford, Shropshire — all stock held in the UK, dispatched same day on weekday orders before 2pm, with free delivery to any UK address. Our in-house technical team has specified profiles for residential, commercial, and hospitality projects across the UK since 2020, and every order comes with phone and email support from people who have physically installed these products.
- UK stock, UK dispatch: Every profile, diffuser, end cap, and mounting clip in our 2026 catalogue is held in our Telford warehouse. No drop-shipping from overseas. No three-week waits. Orders placed before 2pm Monday to Friday dispatch the same day.
- Free UK delivery: No minimum order for free delivery. Whether you need one 1-metre profile for a single shelf or 200 metres for a commercial fit-out, delivery is included.
- Technical support from installers: Call 01952 370008 Monday to Friday, 9am–5pm, and speak to a team member who has hands-on experience with every profile in the range. We help you match the channel width to your strip, select the right diffuser, and spec the correct accessories — before you order, not after you discover a problem on site.
- Complete system compatibility: Our profiles are tested and confirmed compatible with every LED strip and COB strip in the UK LED Lights range. Width, depth, and diffuser clip dimensions are verified against our strip inventory — no guesswork, no trial-and-error on site.
- Trade and project pricing: Electricians, fit-out contractors, and interior designers ordering for ongoing projects — email sales@ukledlights.co.uk for trade pricing and volume discounts. We supply repeat trade customers across the UK with consistent stock availability and priority dispatch.
- Company registration: UK LED Lights Ltd, Company No: 12301805, registered at Unit D4, Stafford Park 4, Telford, Shropshire, TF3 3BA. A real UK business with a physical warehouse, a real phone number, and a team you can visit.
- Profiles are not optional for visible installations — they are the heatsink that determines whether your strip lasts 3 years or 15.
- We cut profiles to custom lengths at our Telford facility — no minimum order, no cutting fee.
If you have a project in progress and need profiles, strip, drivers, and accessories specified as a complete package, call 01952 370008 or email sales@ukledlights.co.uk with your drawings or measurements. We will send you a complete parts list, confirmed compatible, priced, and ready to order — typically within one working day.
How do aluminium profiles compare to silicone covers for LED strip?
Aluminium profiles and silicone covers both protect LED strip, but they handle heat, flexibility, and light output in opposite ways.
| Feature | Aluminium Profile | Silicone Cover |
|---|---|---|
| Heat dissipation | Excellent — aluminium heatsinks the strip | Poor — silicone insulates heat |
| Flexibility | Rigid — straight runs only | Fully flexible — follows curves |
| Strip replacement | Easy — lift diffuser, swap strip | Difficult — strip is encapsulated |
| Light output preserved | 70-95% (milky to clear diffuser) | 65-80% (silicone absorbs more) |
| Weather protection | Requires sealed end caps for outdoor | IP67 built in (enclosed tube type) |
| Best for | Straight indoor runs, kitchens, commercial | Signage, curves, outdoor borders, neon effects |
For straight, high-output installations where heat management matters, aluminium profiles are the professional choice. For curved or outdoor applications where flexibility is essential, silicone covers provide the neon-style effect. Call 01952 370008 for advice.
What are the most common questions about LED strip profiles?
Do I need a profile for COB LED strip?
- Yes, for any visible installation. COB strip is already dot-free, but it still generates heat that requires a heatsink for full lifespan. A profile also protects the strip from physical damage, dust, and adhesive failure. The only exception is a completely hidden location with good natural airflow.
Can I use one profile for different strip widths?
- Only if the strip is narrower than the channel. A 10mm strip fits into a 12mm channel, but a 12mm strip does not fit into a 10mm channel. Always check the internal channel width against your strip width before ordering.
How long do aluminium LED profiles last?
- Indefinitely under normal conditions. Anodised aluminium does not corrode in dry or standard indoor environments. The aluminium body will outlast multiple generations of LED strip. Only the diffuser may need replacement after many years if it yellows from prolonged UV exposure — and replacement diffusers are available separately.
Are silicone profiles better than aluminium for curved installations?
- For curves, yes. Rigid aluminium cannot bend. A silicone profile flexes to follow curved surfaces — arched doorways, curved walls, boat interiors, and signage. Aluminium is the better choice for straight runs due to its superior heatsinking.
Can I join two profile lengths together?
- Yes, using internal joining connectors. These aluminium sleeves slide inside both profile ends, holding them in exact alignment for a continuous run. The joint is invisible once the diffuser is fitted. Available for all profile types in the UK LED Lights range.
Do profiles work with RGB and RGBW strip?
- Yes — all profile types accept RGB and RGBW strip. Confirm the strip width fits the channel (RGB and RGBW strips are typically 10mm or 12mm wide). Use a milky diffuser for the best colour mixing — it blends the individual red, green, blue, and white channels into a smooth combined output.
What tools do I need to install LED strip profiles?
- Basic hand tools only: tape measure, spirit level, pencil, hacksaw (32-TPI blade) or mitre saw, fine flat file, craft knife, screwdriver or drill for mounting clips. No specialist equipment is required for any standard surface-mount or corner profile installation.
Can I get profiles pre-cut to my exact length?
- Yes — call 01952 370008 with your measurements. Our Telford warehouse team can pre-cut profiles before dispatch for commercial orders or projects where on-site cutting is not practical. Standard stock lengths are 1m, 2m, and 3m.
How do I clean an installed LED strip profile?
- Wipe the diffuser with a soft, dry or slightly damp microfibre cloth. Do not use abrasive cleaners, solvents, or chemical sprays on the polycarbonate diffuser — they cause permanent hazing. For kitchen installations with grease build-up, a mild soapy water solution on a soft cloth is sufficient.
Do UK LED Lights profiles come with diffusers and end caps included?
- Check each product listing for included components. Most profile kits in the UK LED Lights 2026 range include the aluminium channel, one diffuser, and a pair of end caps. Mounting clips and joining connectors are typically available as separate accessories. Every listing states exactly what is included.
Can LED strip profiles be used outdoors?
- Standard anodised aluminium profiles are suitable for sheltered outdoor locations. Under covered patios, porches, and carports, standard profiles perform well.
- For fully exposed outdoor installations, use profiles with IP-rated sealed end caps and pair with IP67-rated strip to protect against moisture ingress.
- Avoid untreated aluminium in coastal locations where salt air accelerates corrosion. Anodised finishes provide adequate protection for most UK outdoor conditions.
Do LED strip profiles reduce light output?
- Milky diffusers reduce transmitted brightness by approximately 15–30 percent compared to bare strip. This is the trade-off for hiding LED dots and producing a smooth, even light line.
- Clear diffusers transmit approximately 95 percent of output — use these where maximum brightness matters more than dot hiding, such as task-critical kitchen worktops.
- The profile body itself does not reduce output — it acts as a heatsink and physical housing only.
What is the maximum length of an LED strip profile?
- Standard stock lengths are 1 metre, 2 metres, and 3 metres. For installations longer than 3 metres, join multiple lengths with internal joining connectors.
- Joining connectors create an invisible joint once the diffuser is fitted — the seam is not visible in the finished light line.
- For bespoke pre-cut lengths, call 01952 370008 with your measurements. Our Telford warehouse team can prepare profiles before dispatch.
Can I use LED strip profiles with RGB or RGBW strip?
- Yes — all profile types accept RGB and RGBW strip. Confirm the strip width fits the internal channel (RGB and RGBW strips are typically 10mm or 12mm wide).
- Use a milky diffuser for the best colour mixing — it blends individual red, green, blue, and white channels into a smooth combined output.
- RGB and RGBW strip must use a non-dimmable constant-voltage driver paired with a dedicated controller. Never use a standard dimmer or dimmable driver — it causes flicker and colour shift.
Does UK LED Lights offer free delivery on profiles?
- Yes — free UK mainland delivery on every order, including profiles of all lengths. No minimum spend required.
- Orders before 2pm Monday to Friday dispatch same day from our Telford warehouse — Unit D4, Stafford Park 4, TF3 3BA.
- For bulk or trade orders, email sales@ukledlights.co.uk or call 01952 370008 for volume pricing.
Can I mount LED strip directly onto bare metal without a profile?
- Never mount LED strip directly on bare, uninsulated metal. Exposed copper traces on the PCB underside will short-circuit against conductive metal surfaces such as steel brackets, bare copper pipe, or untreated aluminium angle.
- An anodised aluminium profile provides the insulating barrier needed between strip and mounting surface.
- If a profile is not practical, apply a non-conductive insulating layer between the strip and the metal surface before adhering.
What colour temperature should I choose for profiles in a kitchen?
- 3000K warm white is the most popular kitchen specification in 2026 — warm enough for evening dining, clear enough for food preparation.
- 4000K natural white suits kitchens where accurate food colour rendering is the top priority.
- Avoid 6000K cool white unless the space is exclusively a commercial preparation area. Call 01952 370008 for help choosing.
How do I prevent flickering with LED strip in profiles?
- Replace any leading-edge dimmer with a trailing-edge model. This costs approximately £15 and fixes the most common cause of LED strip flickering in UK homes.
- Ensure the driver is rated for trailing-edge or TRIAC dimming and sized to at least 120 percent of total strip wattage.
- Check all connections: Loose terminals, poor solder joints, and degraded connectors all produce intermittent flicker that mimics dimmer-related problems.
Should I power LED strip while it is still coiled on the reel?
- Never power LED strip while coiled. Heat cannot escape from a coil — temperatures rise rapidly, adhesive softens, LEDs degrade, and fire risk increases.
- Always uncoil, mount on a surface or inside a profile, and secure the strip fully before connecting power.
- Even brief testing while coiled can cause permanent adhesive and LED damage.
Can I use IP65 strip outdoors inside a profile?
- IP65 strip is not recommended for permanent UK outdoor use, even inside a profile. IP65 covers surface splashes only and does not withstand sustained rainfall, frost-thaw cycling, or ground-level damp.
- Use IP67 minimum for any permanent outdoor installation. The sealed silicone encapsulation protects against the conditions that destroy IP65 strip within months.
- IP68 is required for submersible or water feature applications.
Last reviewed: March 2026 — UK LED Lights technical team, Telford, Shropshire. Specifications current as of 2026.
UK LED specialist, Telford, Shropshire · 01952 370008 · Free UK delivery
Explore the range
-
Surface Mount LED ProfilesClean lines for surface installations

-
Recessed LED ProfilesA flush, architectural finish

-
Corner LED ProfilesEven light through corners

-
Architectural & Floor LED ProfilesDurable in-floor integration

-
LED Neon Flex Channels & TracksMounting for flexible neon

-
Flexible Silicone LED Profiles & CoversFlexible channels for curved details


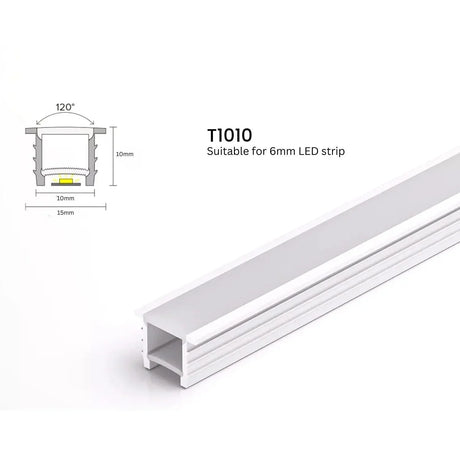
Silicone Neon Flex Cover Diffuser Flexible Bendable for LED Strip 10x10mm
SKU: T1010From £7.17Unit price /Unavailable
Silver Aluminium LED Corner Profile 16×16mm, Opal Diffuser – 1 & 2 Metre
SKU: CP16X16MM-1M-WHFrom £13.75Unit price /Unavailable
Silver Aluminium LED Corner Profile 19×19mm, Opal Diffuser – 1 & 2 Metre
SKU: PROFILE614From £11.95Unit price /Unavailable
Silver Aluminium LED Recessed Profile 25×7mm, Opal Cover – 1 & 2 Metre
SKU: ALRPROF25X7X12-508From £9.25Unit price /Unavailable

Silver Aluminium LED Surface Profile 17×8mm, Opal Diffuser – 1 & 2 Metre
SKU: ALPROFILE-509From £8.95Unit price /Unavailable


Straight Plaster-In Aluminium LED Profile 55.5×13mm, Opal Cover – 1, 2 & 2.45 Metre
SKU: S-PIP-P1513-1MFrom £14.50Unit price /Unavailable


Straight Plaster-In Aluminium LED Profile 60.3×15mm, Opal Cover – 1, 2 & 2.45 Metre
SKU: S-PIP-P2015-1MFrom £14.75Unit price /Unavailable
Straight Tile-In Aluminium LED Profile for 15×15mm Neon Flex
SKU: NFPROFILE-T1515-1MFrom £11.95Unit price /Unavailable
Straight Tile-In Aluminium Profile for 10×10mm IP67 Neon Flex
SKU: NFPROFILE-T1010-1MFrom £11.95Unit price /Unavailable
Straight Tile-In Aluminium Profile for 10×20mm IP67 Neon Flex
SKU: NFPROFILE-T1020-1MFrom £11.95Unit price /Unavailable
Straight Tile-In Aluminium Profile for 8×16mm IP67 Neon Flex
SKU: NFPROFILE-T0816-1MFrom £11.84Unit price /Unavailable
Tile-In Aluminium Profile 6×12mm IP67 Neon Flex 1 metre & 2 Metre
SKU: NFPROFILE-T0612-1MFrom £11.75Unit price /Unavailable


Types of LED Strip Profiles
Surface Mount Profiles
Our surface mount LED strip aluminum profiles are designed for easy installation on walls, ceilings, and cabinets. These versatile channels create a sleek, professional finish while protecting your LED strips from dust and damage. Available in various depths to accommodate different strip widths and provide optimal heat dissipation.
Recessed Profiles
Create seamless, integrated lighting with our LED strip recessed channels. These profiles sit flush within surfaces, offering a minimalist look with maximum impact. Perfect for modern interiors, these ceiling LED strip channels can be installed in drywall, wood, or tile for clean, shadow-free illumination.
Corner Profiles
Our LED strip corner profiles are specifically designed for 90° installations, allowing you to highlight architectural edges with precise, continuous light. These corner aluminum LED strip channels ensure perfect illumination around corners without visible gaps or inconsistencies.
Angled Profiles
The angled LED strip profile collection offers options at 30°, 45°, and 60° angles to direct light exactly where you need it. These profiles are ideal for under-cabinet lighting, display cases, and feature highlighting where directed light creates the desired effect.
Bendable Profiles
Our bendable LED strip channels and flexible LED strip channels allow for creative, curved installations that follow architectural features or create custom shapes. These LED strip curved profiles can be gently shaped to achieve smooth, continuous lighting along curved surfaces.
Material & Quality Features
Premium Aluminum Construction
Our aluminium LED strip channels are crafted from high-grade anodized aluminum that offers superior heat dissipation, extending the lifespan of your LED strips. The LED strip in aluminium profile combination creates a professional finish while ensuring optimal performance.
Diffuser Options
Each LED strip profile cover is available in multiple diffuser options:
- Clear: Maximum brightness with visible LEDs
- Frosted: Balanced light output with reduced LED visibility
- Opal: Smooth, homogeneous light with no visible LED dots
Finish Variations
Choose from silver anodized (standard), white, or LED strip profile black finishes to complement your interior design. Our black LED strip channel options provide a sophisticated, contemporary look that pairs beautifully with modern décor.
Application Solutions
Indoor Commercial Applications
- Retail displays and shelving illumination
- Office space accent and indirect lighting
- Restaurant and hospitality mood lighting
- Museum and gallery exhibit highlighting
Residential Solutions
- Kitchen under-cabinet task lighting
- Ceiling LED strip channel installations for cove lighting
- Staircase and hallway safety lighting
- Home entertainment ambient lighting
- Wardrobe and closet illumination
Specialized Applications
- Outdoor LED strip profiles for garden and patio lighting
- Tile edge LED strip light channels for bathroom and kitchen feature lighting
- Drywall LED strip channels for seamless ceiling integration
- Display case and cabinet internal lighting
How to Choose the Right LED Strip Profile
Consider Your LED Strip Dimensions
Ensure your LED strip mounting channel is compatible with your LED strip width. Our profiles accommodate strips from 8mm to 20mm wide, with specific models designed for high-density and COB strip lighting.
Evaluate Installation Location
For outdoor or humid environments, choose outdoor LED strip light channels with weather-resistant features. Interior installations offer more flexibility in profile selection.
Determine Mounting Method
Consider whether your installation requires surface mounting, recessing, or corner installation. Our LED strip mounting profiles include specific solutions for each scenario, complete with appropriate mounting hardware.
Consider Light Effect
Different diffuser options and profile shapes create varying lighting effects. Opal diffusers provide smooth, uniform light, while angled profiles direct illumination to specific areas.
Technical Specifications
Material Properties
- Construction: Anodized aluminum (standard) or plastic LED strip channels for specific applications
- Finish Options: Silver, white, or black anodized
- Heat Dissipation: Optimized thermal management design
Dimensions & Compatibility
- Width Accommodation: 8mm-20mm LED strips
- Standard Lengths: 1m and 2m sections (custom cutting available)
- Profile Heights: 7mm-15mm depending on model
Accessories Included
- End caps for clean termination
- Mounting brackets for secure installation
- Connectors for extended runs
- Diffuser covers in clear, frosted, or opal options
Installation Best Practices
Preparation
Measure carefully and mark installation locations before beginning. Ensure power connections are properly planned, particularly for longer LED strip lighting channel runs that may require multiple power injection points.
Mounting Considerations
Use mounting clips every 50cm for secure attachment. For recessed installations, ensure cutout dimensions match profile measurements exactly for a clean fit.
Professional Finish Tips
Install end caps for a polished appearance. When joining sections, use connecting pins to ensure perfect alignment of both the aluminum LED strip profiles and diffusers.
Frequently Asked Questions
Compare surface mounted versus recessed LED profiles
Surface-mounted profiles sit on top of the substrate and are quick to install and service, while recessed profiles are hidden for a flush, minimalist look but require cutting into the substrate and more precise installation.
What profile width fits a 12 millimetre LED strip?
Choose a profile with an internal channel at least 2–3 mm wider than the strip (so ~14–15 mm internal width) to allow for the strip, wiring tolerance and thermal expansion.
Best diffusers for even light distribution in profiles
Opal or frosted diffusers are best for even, dot-free light; they sacrifice a little raw lumen output for much smoother distribution compared with clear covers.
Profiles and channels rated for outdoor use and IP ratings
Outdoor-rated profiles use sealed end caps, gaskets and IP65–IP68 covers or housings; specify the IP rating based on exposure (IP65 for splash, IP67/IP68 for temporary/permanent immersion).
How to measure channel depth for flush mounting installations
Measure the total depth from the finished surface to the back of the recess and allow extra room for the diffuser and cable the internal depth must match profile height plus clearance for wiring and thermal expansion.
Which profile depth do I need for my LED strip?
Pick a depth that comfortably houses the strip and diffuser while allowing airflow; higher-power strips need deeper profiles (10–20 mm+), while low-profile strips can work in shallower channels (6–10 mm).
Can LED strip profiles be cut to custom sizes?
Yes aluminium profiles can be cut to length with a fine-tooth saw and plastic diffusers trimmed to match, but always deburr cuts and reseal ends for outdoor use.
Are your profiles suitable for outdoor use?
Many aluminium profiles are suitable outdoors when used with the correct IP-rated end caps and seals; always check the product’s IP and UV/finish specification before external installation.
How do I install LED strip profiles in corners or around curved surfaces?
Use corner-specific profiles or flexible/bendable profiles for curves; for tight radii, use segmented straight sections with mitred joins or dedicated curved profile systems.
What's the difference between surface mount and recessed profiles?
Surface mount profiles are installed on top of the surface and are easier to retrofit, while recessed profiles are embedded for a flush finish and a more architectural appearance that conceals the fixture.
Do I need special tools to install LED strip profiles?
Basic tools (fine-tooth saw, drill, screwdriver, file, silicone gun) are usually sufficient; specialized bending tools are helpful for flexible profiles or engineered curves but not always required.
How do diffusers affect light output?
Diffusers reduce visible LED dots and soften glare but cut raw lumen output slightly more opaque diffusers give smoother light but lower peak brightness.
Can I connect multiple profile sections together?
Yes profiles are normally joined using connectors, mitred corners, or couplers; ensure mechanical joins are secure and cable runs/junctions are properly sealed for outdoor use.
What are LED strip profiles and how do they differ from installing LED strips without channels?
Profiles are aluminium channels with diffusers that protect the strip, improve heat dissipation, and provide a finished look; installing strips without channels risks poorer thermal performance, visible LEDs, and a less durable finish.
What are the main types of LED strip profiles and where is each best used?
Surface profiles for retrofit and visible trims, recessed for flush architectural lines, corner profiles for 90° details, and bendable/flexible profiles for curves and custom shapes.
How do aluminium and plastic profiles compare in heat management, durability, and appearance?
Aluminium offers superior heat dissipation and a premium finish, while plastic profiles are cheaper, lighter and easier to shape but offer poorer thermal performance and potentially shorter life outdoors.
How do you choose the correct LED profile for different strip widths (8 mm, 10 mm, 12 mm, 20 mm)?
Match the internal channel width to the strip width plus clearance (~+2–3 mm); for wider strips (20 mm) choose deeper profiles that also accommodate wider diffusers and cables.
Best practices for cutting, drilling, and mounting LED profiles on ceilings, walls, and furniture
Measure and mark precisely, use a fine-tooth saw and deburr edges, pre-drill fixing holes, fix with appropriate screws or clips, and seal end caps and joins where needed for a clean, long-lasting finish.
How should diffusers, end caps, and mounting clips be used to complete a professional LED profile installation?
Insert the strip, snap in the diffuser, cap both ends to protect from dust/water, and use mounting clips at recommended intervals to prevent sagging; seal and cable-gland outdoor entries as required.
How much does an aluminium profile improve LED strip lifespan and brightness stability compared with bare mounting?
Aluminium profiles significantly improve heat dissipation, which reduces LED junction temperature and generally extends lifespan and maintains lumen output more consistently than bare mounting.
How do different diffuser types (opal, frosted, clear) change light distribution, dot visibility, and lumen output?
Opal/frosted diffusers produce smooth, dot-free light with reduced glare but lower measured lumen output; clear diffusers preserve maximum brightness but show individual LED points more readily.
When is a deeper or wider profile needed to achieve fully dotless “neon-style” lines of light?
Deeper/wider profiles are needed when using higher-density strips or when maximal diffusion is required; choose a profile that allows a larger diffuser and distance between LEDs and the cover to eliminate dotting.
How can recessed LED strip profiles be used for shadow gaps, ceiling coves, and wall washes?
Recessed profiles produce hidden light sources ideal for shadow gaps and coves, providing uniform indirect illumination and clean architectural lines for ceiling and wall wash effects.
Which profiles work best for under-cabinet, shelving, and wardrobe lighting to avoid glare and hotspots?
Shallow surface or corner profiles with opal diffusers and narrow beam strips are ideal to provide even task light without visible hotspots or glare.
How can corner and bendable profiles be used to highlight architectural details or create curves?
Corner profiles neatly conceal strips along 90° edges, while bendable profiles let you follow curved lines and organic shapes for signage, feature walls, and bespoke retail or hospitality installations.
What should specifiers look for when choosing LED strip profiles (height, internal width, finish, diffuser type, IP rating)?
Specify internal width to match strip size, profile height for mounting depth and thermal needs, finish to suit design, diffuser type for desired light quality, and IP rating for environmental protection.
How do UK suppliers bundle profiles with LED strips, drivers, and accessories to create complete linear lighting systems?
Suppliers commonly offer kits combining profiles, pre-cut diffusers, LED strips, compatible drivers, end caps, clips and glands so installers receive a matched system that simplifies specification and installation.