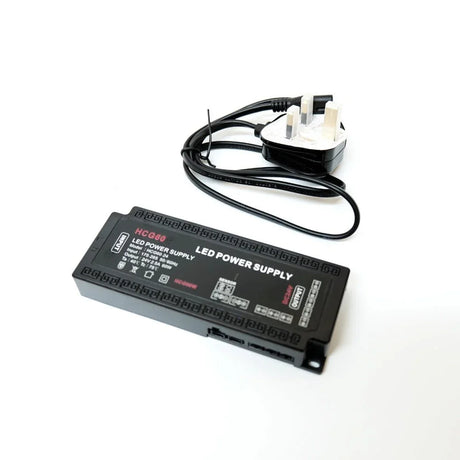
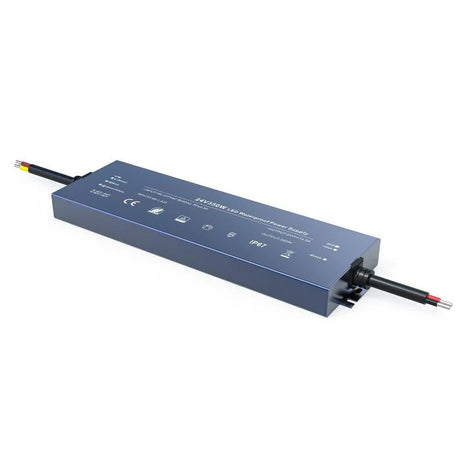
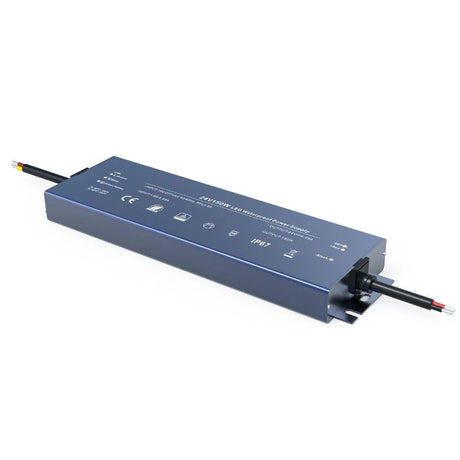
Choosing the wrong LED driver kills more installations than faulty strip — get the voltage, wattage, and dimming type right first time and your LED lighting runs for years without a single callback. UK LED Lights stocks constant voltage LED drivers in 12V, 24V, and 48V across wattages from 60W to 600W, with IP20 indoor and IP67 weatherproof options ready to dispatch from our Telford warehouse.
Every LED driver we supply is tested against BS7671 wiring standards, available in Triac dimmable and non-dimmable configurations, and backed by our technical team on 01952 370008. From a compact 60W unit for under-cabinet strip to a 600W driver for a full commercial fit-out, we match the right power supply to your project — and explain exactly why.
12V · 24V · 48V · 60W–600W · IP20 Indoor · IP67 Outdoor · Triac Dimmable · Non-Dimmable · UK 3-Pin Plug · Hardwire · Free UK Delivery
Which LED driver do you need? — Quick decision summary
Match your driver voltage to your strip voltage exactly — a 24V strip on a 12V driver will not light, and a 12V strip on a 24V driver will burn out. Add up total strip wattage and choose a driver rated at least 20% higher. If you want to dim single-colour strip from a wall dimmer, choose a Triac dimmable driver with a trailing-edge dimmer. If you run RGB or RGBW strip, choose a non-dimmable driver paired with a separate RGB controller.
-
Under-cabinet or small bedroom install (up to 5 metres): 60W–100W driver at matching voltage, UK 3-pin plug version for simplest connection.
-
Kitchen, bathroom, or living room (5–15 metres total): 150W–200W driver, Triac dimmable if single-colour, hardwire connection for permanent installation.
-
Large open-plan space or commercial fit-out (15–30 metres): 300W–600W driver, 48V preferred for reduced voltage drop over long cable runs.
-
Outdoor garden, decking, or facade lighting: IP67-rated driver mounted in a ventilated enclosure, sized with 20–30% headroom above total strip wattage.
-
RGB or RGBW colour-changing strip: Non-dimmable constant voltage driver only — never connect RGB strip to a Triac dimmable driver (causes flicker, colour shift, and premature controller failure).
Who are these LED drivers for?
-
Homeowners fitting LED strip lighting in kitchens, bedrooms, bathrooms, or living rooms who need a reliable, correctly sized power supply.
-
Electricians and installers who need trade-quality drivers with clear BS7671-compliant wiring specs and consistent stock availability.
-
Commercial and hospitality specifiers fitting out restaurants, hotels, retail displays, or offices with large-scale LED installations.
-
Landscape and garden designers who need IP67 weatherproof drivers rated for year-round UK outdoor conditions.
Who should NOT buy these LED drivers?
-
Anyone needing a constant current driver: Our LED drivers are constant voltage output — designed for LED strip and neon flex. Constant current drivers (rated in milliamps) are a different product for different LED types.
-
Anyone expecting a driver to dim RGB strip: RGB and RGBW strip requires a dedicated controller, not a dimmable driver. The driver powers the system; the controller manages colour mixing.
-
Anyone replacing a halogen transformer: Old halogen transformers output AC voltage. LED strip requires regulated DC voltage. A halogen transformer will not power LED strip safely — you need a proper LED driver.
Common LED driver buying mistakes
-
Undersizing the driver: Running a driver at 100% capacity generates excess heat, shortens lifespan, and can trigger thermal shutdown. Always size at least 20% above your total strip wattage — a 10-metre run of 14.4W/m strip draws 144W, so you need a minimum 180W driver, not a 150W.
-
Mismatching voltage: A 24V driver connected to 12V strip doubles the voltage across the LEDs and destroys them within seconds. Voltage must match exactly: 12V to 12V, 24V to 24V, 48V to 48V.
-
Using a Triac dimmable driver with RGB strip: RGB and RGBW strip uses a multi-channel controller that requires stable, non-dimmed power. A dimmable driver interferes with the controller signal, causing flicker, incorrect colours, and shortened component life.
-
Pairing with a leading-edge dimmer: Leading-edge dimmers were designed for incandescent and halogen loads. They create voltage spikes that cause visible flicker, audible buzzing, and premature driver failure in LED circuits. A trailing-edge dimmer — typically costing around £15 — solves all three problems.
-
Choosing IP20 for outdoor or bathroom use: IP20 drivers have no moisture protection. Outdoor installations and bathroom zones 1 and 2 under BS7671 require IP67 minimum. One rain ingress event or condensation build-up will short-circuit an IP20 driver permanently.
Jump to section:
- How do LED drivers work and why does every strip installation need one?
- What is the difference between constant voltage and constant current LED drivers?
- How do you calculate the correct LED driver wattage for your project?
- Which voltage should you choose — 12V, 24V, or 48V?
- When should you use a Triac dimmable LED driver?
- What IP rating does your LED driver need?
- How do you wire an LED driver to UK mains?
- Why does 48V reduce voltage drop in longer cable runs?
- What causes LED driver failure and how do you prevent it?
- Why buy LED drivers from UK LED Lights?
How do LED drivers work and why does every strip installation need one?
An LED driver converts 230V AC mains electricity into the low-voltage DC power that LED strip requires — typically 12V, 24V, or 48V DC. Without a driver, connecting LED strip to mains power would destroy the LEDs instantly. The driver regulates both voltage and current output, protecting the LEDs from power fluctuations while delivering a stable, clean DC supply that maintains consistent brightness across the full strip length.
The term "LED driver" is often used interchangeably with "LED transformer" and "LED power supply," though there is a technical distinction worth understanding. A true transformer simply steps voltage down — the old magnetic transformers used for halogen downlights are a good example. An LED driver goes further: it converts AC to DC, regulates the output voltage to a precise level, and includes protection circuits for overload, short-circuit, and over-temperature conditions. In 2026, virtually all quality LED power supplies marketed in the UK include these driver-level features, which is why the terms have merged in common use.
Inside the driver enclosure, a switched-mode power supply (SMPS) circuit handles the AC-to-DC conversion at high frequency, which is what allows modern LED drivers to be compact and lightweight compared to the heavy iron-core transformers of the halogen era. The efficiency of a well-designed LED driver sits between 88% and 94% — meaning only 6–12% of input power is lost as heat. That efficiency matters because it directly affects how warm the driver runs and how long it lasts in service. A driver running at 92% efficiency on a 200W load generates roughly 16W of waste heat — manageable with adequate ventilation. Push that same driver to 100% load and efficiency drops, heat output rises, and lifespan shortens considerably.
-
Overload protection: Shuts the driver down if total connected wattage exceeds the rated capacity, preventing damage to both driver and LEDs.
-
Short-circuit protection: Cuts output immediately if positive and negative wires contact each other, which prevents cable and component damage.
-
Over-temperature protection: Reduces output or shuts down entirely if the internal temperature rises beyond safe operating limits — a critical safety feature in enclosed installations.
-
Soft-start circuit: Limits inrush current at switch-on, which reduces stress on the driver components and prevents tripping sensitive MCBs on the consumer unit.
What is the difference between constant voltage and constant current LED drivers?
Constant voltage (CV) LED drivers maintain a fixed output voltage — 12V, 24V, or 48V DC — and allow current to vary depending on the connected load. This is the correct driver type for LED strip, LED neon flex, and any LED product that specifies an operating voltage rather than an operating current in milliamps. All LED drivers sold by UK LED Lights are constant voltage output, purpose-matched to strip and neon flex applications.
Constant current (CC) drivers work the opposite way: they maintain a fixed current output (measured in milliamps — typically 350mA, 700mA, or 1050mA) and allow voltage to fluctuate. CC drivers are designed for LED downlights, panel lights, and architectural fittings where the LED module specifies a required forward current. Using a CC driver on LED strip would deliver unregulated voltage to the strip, causing unpredictable brightness, hot spots, and likely component failure.
| Feature |
Constant Voltage (CV) |
Constant Current (CC) |
| Output type |
Fixed voltage (12V, 24V, 48V DC) |
Fixed current (350mA, 700mA, 1050mA) |
| Primary use |
LED strip, neon flex, signage |
Downlights, panels, architectural fittings |
| Load flexibility |
Can connect any wattage up to rated maximum |
Must match LED module forward voltage range |
| Wiring method |
Parallel — strips wired side by side to same driver |
Series — LEDs wired end to end through driver |
| Sold by UK LED Lights? |
Yes — full range 12V, 24V, 48V |
No — contact us for project advice |
The simplest way to identify which type you need: if your LED product label states a voltage (12V, 24V, 48V), you need a constant voltage driver. If it states a current in milliamps (350mA, 700mA), you need a constant current driver. Never guess — the wrong driver type can destroy your LED product on first power-up. If you are unsure, call our technical team on 01952 370008 or email sales@ukledlights.co.uk with your LED product details.
How do you calculate the correct LED driver wattage for your project?
Multiply the wattage per metre of your LED strip by the total metres you plan to install, then add a minimum 20% headroom. This headroom prevents the driver from running at full capacity, reduces operating temperature, extends driver lifespan, and allows for minor future additions to the circuit without replacing the entire power supply.
The calculation itself takes less than a minute once you know two figures: your strip's wattage per metre (printed on the product label or listed on the product page) and the total length of strip in your installation. Here is the formula applied to three common scenarios:
Worked examples — driver sizing for real installations
| Scenario |
Strip spec |
Length |
Total wattage |
+20% headroom |
Recommended driver |
| Under-cabinet kitchen |
24V, 10W/m |
4m |
40W |
48W |
60W 24V |
| Living room coving |
24V, 14.4W/m |
12m |
172.8W |
207W |
250W 24V |
| Commercial bar front |
48V, 20W/m |
25m |
500W |
600W |
600W 48V |
Notice in each case the recommended driver is the next available wattage above the calculated headroom figure — not the exact figure. If your headroom calculation lands at 207W, choose a 250W driver rather than a 200W. Running a driver just above its rated capacity — even by a few watts — creates the same thermal stress as running at 100%, negating the purpose of the headroom calculation entirely.
Step-by-step driver sizing method
-
Check the strip wattage per metre: Find the W/m figure on the product label or UK LED Lights product page — for example, 14.4W/m for a typical high-output COB strip.
-
Measure total strip length: Add up all strip lengths connected to this driver, including any short return runs or corner sections — do not estimate, measure precisely.
-
Multiply W/m by total metres: 14.4W/m multiplied by 12 metres equals 172.8W total strip load.
-
Add 20% minimum headroom: 172.8W multiplied by 1.2 equals 207.4W — this is your minimum acceptable driver wattage.
-
Select the next driver size up: Choose the nearest driver above 207.4W — in this case, a 250W unit from the UK LED Lights range. If you anticipate adding more strip within the next 12 months, consider stepping up to 300W for additional future capacity.
For installations with multiple separate zones, you have two options: one large driver powering all zones through parallel connections, or individual drivers for each zone. Separate drivers per zone give you independent control, easier fault isolation, and simpler replacement — which is why most professional installers in 2026 prefer the multi-driver approach for anything above two zones. Contact our technical team if you need help planning a multi-zone layout.
Which voltage should you choose — 12V, 24V, or 48V?
For most UK residential and small commercial LED strip installations, 24V is the default choice in 2026 — it offers a strong balance between component availability, voltage drop performance, and cost. Choose 12V only for specific short-run products that require it. Choose 48V when cable runs exceed 10 metres or when total system wattage is high, because 48V halves voltage drop compared to 24V at the same wattage over the same distance.
Voltage selection is not a preference — it is dictated by the strip you have chosen. A 24V strip requires a 24V driver. There is no benefit to buying a 48V driver for 24V strip; you would destroy the strip. The voltage decision happens at strip selection stage, and the driver simply matches it. That said, understanding why each voltage exists helps you make a better-informed strip choice in the first place.
-
12V: The original LED strip voltage. Component availability is wide, but voltage drop is the highest of the three options — noticeable brightness fading typically appears beyond 5 metres on a single feed. Best suited for short runs in display cases, furniture accents, or retrofit projects where existing 12V infrastructure is already in place.
-
24V: The current mainstream standard. Voltage drop occurs at half the rate of 12V, which means consistent brightness up to approximately 10 metres on a single feed. The widest range of strip densities, colour temperatures, and IP ratings are available in 24V. Most professional UK installers specify 24V as the default for residential and light commercial projects.
-
48V: The professional and commercial choice for 2026 and beyond. Voltage drop occurs at half the rate of 24V (one-quarter the rate of 12V), making it the clear choice for runs exceeding 10 metres, high-wattage commercial installations, and projects where minimising cable thickness matters. 48V DC falls within the SELV voltage threshold under BS7671 (120V DC ripple-free maximum), provided it is supplied from a suitably isolated, safety-rated driver — this means significantly reduced shock risk under dry conditions, though it is not zero risk.
| Factor |
12V |
24V |
48V |
| Maximum practical single-feed run |
~5m |
~10m |
~20m |
| Relative voltage drop |
Highest |
Half of 12V |
Quarter of 12V |
| Strip and component availability (2026) |
Wide but declining |
Widest range |
Growing rapidly |
| Typical use case |
Short runs, display, retrofit |
Residential, light commercial |
Commercial, long runs, high wattage |
| SELV classification under BS7671 |
Yes (with isolated driver) |
Yes (with isolated driver) |
Yes (with isolated driver, under 120V DC threshold) |
| Driver availability at UK LED Lights |
60W–200W |
60W–600W |
60W–600W |
One critical point often missed: parallel wiring is best practice for all voltages, but it matters most at 12V where voltage drop is steepest. Series wiring multiplies voltage drop across each connection, leading to visible brightness differences between the start and end of the strip. Wire in parallel from the driver to each strip section independently — or use a double-end feed from both ends of the strip to equalise voltage across the run.
When should you use a Triac dimmable LED driver?
Use a Triac dimmable driver when you want to control single-colour LED strip brightness from a standard wall-mounted trailing-edge dimmer switch. Triac dimming is the most common domestic dimming method in the UK because it works with existing mains wiring — no extra control cables, no separate controllers, and no smart-home hub required. The critical requirement: pair a Triac dimmable driver only with a trailing-edge dimmer, never a leading-edge dimmer.
Leading-edge dimmers — the type that originally shipped with most UK dimmer plates for incandescent bulbs — chop the front of the AC waveform. This creates a sharp voltage spike at each switch-on point in the cycle. Incandescent filaments have enough thermal inertia to absorb these spikes without visible effect, but LED driver electronics respond to the spike with visible flicker, audible buzzing from the driver enclosure, and accelerated component wear. In many cases, the flicker is most noticeable at low dim levels, which is exactly where you want smooth, quiet dimming.
Trailing-edge dimmers chop the back of the waveform instead, producing a gentle voltage ramp-down that LED drivers handle cleanly. The result is smooth, flicker-free dimming from 100% down to approximately 5–10% on most quality Triac dimmable drivers. A trailing-edge dimmer from any major UK electrical brand — Varilight, Hamilton, BG Nexus — typically costs between £12 and £20, and replacing an incompatible leading-edge unit takes an electrician around 15 minutes.
Dimming rules by strip type
-
Single-colour white strip (warm, natural, or cool): Use a Triac dimmable driver paired with a trailing-edge dimmer switch. This is the simplest and most cost-effective dimming setup.
-
Tunable white (CCT adjustable) strip: Use a non-dimmable driver paired with a dedicated CCT controller. The controller handles both brightness and colour temperature — a dimmable driver would interfere.
-
RGB strip: Use a non-dimmable constant voltage driver paired with a dedicated RGB controller. The controller manages each colour channel independently. A dimmable driver causes flicker, colour shift, and premature failure of the RGB controller.
-
RGBW strip: Use a non-dimmable constant voltage driver paired with a dedicated RGBW controller. RGBW adds a fourth dedicated white channel that produces clean white light — RGB alone produces a cold violet-tinged white that is unsuitable for general illumination. The driver provides stable power; the RGBW controller manages all four channels.
If you have already installed a leading-edge dimmer and are experiencing flicker, you do not need to replace the driver. Replace the dimmer switch with a trailing-edge model — a swap that typically costs under £15 for the part and solves the flicker immediately. Contact our team at sales@ukledlights.co.uk for dimmer compatibility advice specific to your installation.
What IP rating does your LED driver need?
For standard indoor installations — kitchens, living rooms, bedrooms, offices — an IP20 driver is sufficient, provided it is mounted in a dry, ventilated location. For outdoor installations, bathrooms (zones 1 and 2 under BS7671), or any location exposed to moisture, condensation, or water spray, choose an IP67-rated driver minimum. IP20 drivers have no moisture ingress protection and will fail permanently after a single exposure event.
The IP (Ingress Protection) rating tells you exactly what level of environmental protection the driver enclosure provides. The first digit rates solid particle protection (dust), the second rates liquid protection (water). For LED drivers, the two ratings you will encounter in the UK market are:
-
IP20: Protected against solid objects larger than 12.5mm (a finger). Zero water protection. Designed exclusively for dry indoor environments — inside a cupboard, above a false ceiling, within a dedicated driver enclosure behind a kitchen plinth. Must never be exposed to moisture, condensation, steam, or outdoor air.
-
IP67: Complete dust-tight enclosure plus protection against temporary immersion in water up to 1 metre depth for 30 minutes. Suitable for outdoor garden lighting, decking installations, facade lighting, bathroom zones 1 and 2, and any location where moisture exposure is possible. The sealed enclosure means IP67 drivers run slightly warmer than IP20 — account for this with adequate mounting clearance.
A common mistake in UK projects: specifying IP65 drivers for outdoor use. IP65 provides protection against low-pressure water jets only — which sounds sufficient until you consider that a typical UK winter delivers wind-driven rain at angles and pressures that exceed IP65 test conditions. For reliable year-round outdoor performance in British weather, IP67 is the practical minimum. UK LED Lights stocks IP67 drivers across all voltages and wattage ranges for exactly this reason.
For bathroom installations, BS7671 divides the space into zones. Zone 0 (inside the bath or shower tray) requires IP68 minimum. Zone 1 (directly above the bath or shower to 2.25m height) requires IP67 minimum. Zone 2 (extending 0.6m beyond zone 1) requires IP44 minimum, though IP67 is recommended for long-term reliability. The driver itself does not need to be mounted inside the bathroom — mounting it in an adjacent loft space or cupboard with an IP20 rating is perfectly acceptable, provided only the IP-rated strip enters the bathroom zones.
How do you wire an LED driver to UK mains?
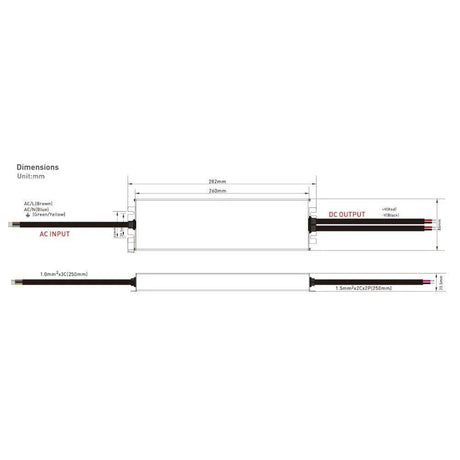
UK mains wiring to an LED driver follows BS7671 colour standards: brown wire to live (L), blue wire to neutral (N), and green-yellow striped wire to earth (E). On the output side, red connects to positive (+) and black to negative (-). All permanent hardwired connections to mains supply must be carried out by a qualified electrician or competent person under Part P of the Building Regulations in England and Wales.
There are two primary connection methods for LED drivers in UK installations, and the right choice depends on whether the installation is permanent or semi-permanent:
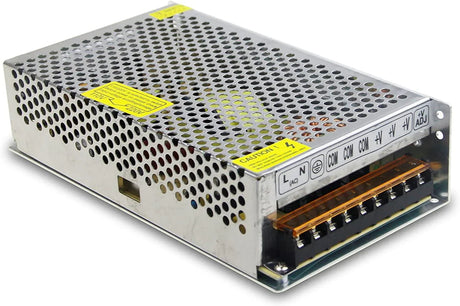
Hardwire connection (permanent installation)
-
Isolate the mains supply: Switch off the relevant MCB at the consumer unit and verify the circuit is dead using a voltage tester — never rely on the switch position alone.
-
Prepare the mains cable: Strip approximately 8mm of insulation from each conductor — brown (live), blue (neutral), and green-yellow (earth). Use proper wire strippers, not a knife, to avoid nicking the copper conductor.
-
Connect mains input to driver: Insert brown into the terminal marked L, blue into N, and green-yellow into the earth terminal. Tighten each screw terminal firmly — a loose connection generates heat and creates a fire risk over time.
-
Connect driver output to LED strip: On the low-voltage DC output side, connect red to the positive (+) terminal and black to the negative (-) terminal. Polarity matters — reversed polarity will not damage most modern strip but the LEDs will not illuminate.
-
Secure and test: Mount the driver in its final position with adequate ventilation clearance (minimum 50mm around all sides for IP20 units), restore power at the consumer unit, and verify correct operation including dimming if applicable.
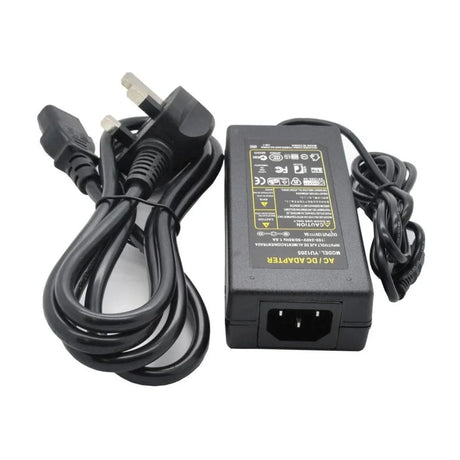
UK 3-pin plug connection (non-permanent installation)
For non-permanent installations — display lighting, temporary event setups, or situations where a plug-in solution is preferred — select a driver with a pre-fitted UK 3-pin plug. The plug connects directly to a standard 13A socket outlet, and the DC output connects to your strip as described above. No mains wiring is required, and no electrician is needed for the installation. This is the fastest connection method and the one we recommend for most homeowner-installed projects in 2026.
Never run mains-rated cable alongside or bundled with the low-voltage DC output cables. Maintain a physical separation of at least 50mm between mains and extra-low voltage cabling, or use separate containment (trunking or conduit) as required under BS7671. For wiring guidance specific to your project, contact our technical team.
Why does 48V reduce voltage drop in longer cable runs?
Voltage drop is proportional to current for any given cable size and length. At higher voltage, the same wattage of LED strip draws less current — a 240W load at 48V draws 5A compared to 10A at 24V and 20A at 12V. Lower current means less voltage lost across the cable resistance, which means more consistent brightness from the driver end to the far end of the strip. This is why 48V is the preferred choice for cable runs exceeding 10 metres in professional installations.
To put real numbers on it: a 10-metre run of 1.5mm² cable carrying 10A (a 240W load at 24V) loses approximately 1.8V — that is 7.5% of the supply voltage. The same cable carrying the same 240W load at 48V draws only 5A, losing approximately 0.9V — just 1.9% of supply voltage. The LEDs at the far end of the 48V run receive 47.1V, close enough to nominal that brightness difference is invisible. The 24V LEDs at the far end receive 22.2V, which may produce a visible brightness drop depending on the strip's voltage tolerance.
-
48V at 240W over 10m (1.5mm² cable): Approximately 0.9V drop — 1.9% — invisible brightness difference.
-
24V at 240W over 10m (1.5mm² cable): Approximately 1.8V drop — 7.5% — noticeable brightness difference at the far end.
-
12V at 240W over 10m (1.5mm² cable): Approximately 3.6V drop — 30% — severe brightness loss, strip may not illuminate fully at the far end.
The practical advantage extends beyond brightness consistency. Lower current at 48V also means you can use thinner cable for the same run length without exceeding acceptable voltage drop thresholds. This reduces material cost, simplifies cable routing through tight spaces, and makes installation physically easier — particularly in retrofit projects where cable routes are constrained. For new commercial fit-outs in 2026, 48V is increasingly specified as the default for exactly these reasons.
One point that requires accuracy: 48V DC falls within the SELV voltage threshold under BS7671 (120V DC ripple-free maximum), provided it is supplied from a suitably isolated, safety-rated driver. SELV classification means significantly reduced shock risk under dry conditions — not zero risk. In wet environments or where the driver is not correctly isolated, additional precautions apply. Always confirm SELV compliance with a qualified electrician for your specific installation.
What causes LED driver failure and how do you prevent it?
The three primary causes of premature LED driver failure are sustained overloading (running at or above rated capacity), inadequate ventilation (trapping heat in sealed enclosures without airflow), and moisture ingress (using IP20 drivers in damp or outdoor environments). Preventing all three requires three simple measures: size the driver with 20% headroom, mount it with at least 50mm clearance on all sides, and match the IP rating to the installation environment.
Driver lifespan in a well-designed installation typically exceeds 50,000 hours — over 11 years at 12 hours daily use. But that figure assumes the driver operates within its designed thermal and electrical envelope. Push a driver beyond those limits and the electrolytic capacitors inside — the component most sensitive to heat — degrade rapidly. Capacitor degradation shows up as flickering output, audible buzzing, reduced brightness, or intermittent shutdown and restart cycles.
Failure prevention checklist
-
Size correctly: Total connected load must not exceed 80% of the driver's rated wattage. A 200W driver should power no more than 160W of strip. This is the single most effective measure for extending driver life.
-
Ventilate the mounting location: IP20 drivers need free airflow around the enclosure. Never mount inside a fully sealed box, behind insulation without a gap, or directly above a heat source like a halogen downlight transformer. Maintain minimum 50mm clearance on all six sides.
-
Match IP rating to environment: If there is any possibility of moisture — even occasional condensation — use an IP67 driver. The cost difference between IP20 and IP67 is minor compared to the cost of replacing a failed driver and the strip section it may damage on failure.
-
Use quality connectors: Loose screw terminals and poor-quality push-fit connectors create resistance at the connection point, which generates localised heat. Tighten all terminals firmly and use connectors rated for the current draw of your circuit.
-
Protect from power surges: In areas prone to mains voltage spikes — common in rural UK locations and older electrical installations — consider adding a Type 2 surge protection device (SPD) at the consumer unit. A single mains spike can destroy driver electronics instantly.
-
Never coil excess cable on the output side: Coiled DC cable creates inductance that can interfere with the driver's output regulation circuit. Run cables neatly and cut to length rather than coiling surplus.
If you suspect a driver fault, check the basics first: verify the mains supply is present at the input terminals using a multimeter, check the DC output voltage matches the driver rating (within 5%), and inspect all connection points for discolouration that indicates heat damage. If the driver shows no output with confirmed mains input, the unit has likely failed and needs replacement. Contact UK LED Lights on 01952 370008 for a replacement matched to your existing installation.
Why buy LED drivers from UK LED Lights?
UK LED Lights is a specialist LED lighting supplier based in Telford, Shropshire, with a dedicated technical team that matches the correct driver to your project before you buy — not after something goes wrong. Every driver we stock has been tested in real installations, sized to real-world UK conditions, and backed by responsive UK-based support on 01952 370008 and sales@ukledlights.co.uk.
-
Correct technical advice before purchase: Our team will confirm your driver voltage, calculate the wattage you need, advise on dimming compatibility, and flag any installation risks — all before you spend a penny. Call 01952 370008 Monday to Friday, 9am–5pm.
-
UK stock, dispatched from Telford: Every driver listed on our site is held in stock at our Telford, Shropshire warehouse (Unit D4, Stafford Park 4, TF3 3BA) — no drop-shipping from overseas, no four-week waits from Chinese warehouses.
-
Free UK delivery: All orders ship free across mainland UK, with most dispatched same day on orders placed before 2pm.
-
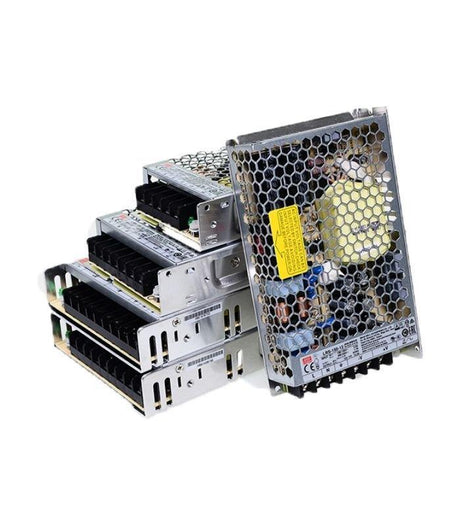
Full voltage and wattage range: 12V, 24V, and 48V drivers from 60W to 600W — Triac dimmable and non-dimmable — IP20 indoor and IP67 outdoor. One supplier for every driver requirement.
-
Tested compatibility with our strip range: Every driver we sell has been tested with the LED strip and neon flex in our range. No guesswork on compatibility — if we sell the strip and we sell the driver, they work together.
-
Trade accounts available: Electricians, installers, and lighting designers can apply for trade pricing. Email sales@ukledlights.co.uk with your company details.
-
Our driver sizing support has prevented thousands of mismatched installations — call 01952 370008 and we will calculate your exact wattage requirement in under two minutes.
-
We stock Mean Well, HiLed, and own-brand drivers tested against UK voltage fluctuations — not just lab-rated units.
Browse the full LED driver range or call 01952 370008 to speak with our technical team. Email us at sales@ukledlights.co.uk for written quotes, trade account enquiries, or project-specific wiring advice. Free UK delivery on every order.
Browse LED strip collections matched to our driver range:
-
COB LED Strip Lights — dot-free 24V and 48V strip, pair with a constant-voltage driver sized to 120% of total wattage.
-
LED Strip Lights — full range of single colour, RGB, RGBW, and COB strip across all voltages.
-
RGB LED Strip Lights — colour-changing strip requiring a non-dimmable driver paired with a dedicated RGB controller.
-
Outdoor LED Strip Lights — IP67 and IP68 weatherproof strip, pair with an IP67 outdoor-rated driver.
-
Kitchen LED Strip Lights — under-cabinet and kickboard strip, typically paired with a Triac dimmable driver and trailing-edge dimmer.
How do triac dimmable, non-dimmable, and DALI LED drivers compare?
The three main LED driver types serve different dimming needs — here is how triac dimmable, non-dimmable, and DALI drivers compare for typical UK installations.
| Feature |
Triac Dimmable |
Non-Dimmable |
DALI / 0-10V |
| Dimming method |
Wall dimmer (trailing-edge) |
None — fixed output |
Dedicated dimming protocol |
| Best for |
Single colour strip with wall switch |
RGB/RGBW with controller, or fixed brightness |
Commercial multi-zone building management |
| Additional wiring |
None — uses existing 2-wire mains |
None |
Separate control cable required |
| Cost |
10-20% more than non-dimmable |
Lowest |
Highest |
| Residential use |
Most popular for 2026 homes |
RGB setups, utility lighting |
Rarely used residentially |
For most 2026 residential single-colour projects, triac dimmable with a trailing-edge dimmer is the standard. For RGB and RGBW, non-dimmable is required. For commercial building management, DALI provides the most precise multi-zone control. Call 01952 370008 for specification advice.
Frequently asked questions about LED drivers
Can I use an old halogen transformer to power LED strip?
-
No. Halogen transformers output AC voltage, while LED strip requires regulated DC voltage. Connecting LED strip to a halogen transformer can cause flicker, overheating, or immediate strip failure. Replace the transformer with a proper constant voltage LED driver matched to your strip voltage.
What happens if I use a driver with a higher wattage than my strip needs?
-
Nothing harmful. A 300W driver powering 100W of strip simply runs at 33% capacity — it will draw less current from the mains, generate less heat, and likely last longer than a 120W driver running at 83% capacity. Oversizing the driver is always safer than undersizing it.
Do I need a dimmable driver if I do not want to dim my strip?
-
No. Non-dimmable drivers are typically less expensive and perfectly suitable for on/off installations. Only specify a Triac dimmable driver if you plan to connect it to a wall-mounted trailing-edge dimmer switch for brightness control.
Why is my LED strip flickering at low brightness?
-
The most common cause is a leading-edge dimmer switch. Leading-edge dimmers create voltage spikes that LED drivers cannot process cleanly at low output. Replace with a trailing-edge dimmer — typically around £15 from any UK electrical wholesaler — and the flicker will stop immediately.
-
If flickering occurs at all brightness levels, check that the driver is not overloaded (total strip wattage exceeds driver rating) and inspect all wiring connections for loose terminals.
Can I connect two different voltage strips to one driver?
-
Absolutely not. A driver outputs a single fixed voltage. Connecting 12V strip to a 24V driver delivers twice the rated voltage to the LEDs, destroying them within seconds. Each voltage of strip requires its own matched-voltage driver.
How far from the LED strip can the driver be mounted?
-
As close as practical. Every metre of cable between the driver and strip adds resistance, which causes voltage drop. For 24V systems, keep cable runs under 5 metres where possible. For 48V systems, runs up to 10 metres are manageable with appropriately sized cable. If distance is unavoidable, increase cable cross-section (e.g., 2.5mm² instead of 1.5mm²) to compensate.
Is it safe to mount an LED driver in a loft or ceiling void?
-
Yes, with conditions. The driver must not be covered by or touching loft insulation — insulation traps heat and can cause thermal shutdown or premature failure. Mount on a timber batten or bracket with minimum 50mm clearance on all sides and ensure the loft has adequate ventilation. IP20 rating is acceptable in a dry loft space.
Do LED drivers make noise?
-
Quality drivers are silent in normal operation. Audible buzzing or whining from an LED driver typically indicates one of three issues: an incompatible dimmer switch (most common), the driver is operating above 90% of its rated capacity, or internal component degradation. If a new driver buzzes from first installation, check the dimmer type first — replacing a leading-edge dimmer with trailing-edge usually resolves the issue completely.
What warranty do UK LED Lights offer on LED drivers?
-
All drivers sold by UK LED Lights carry a manufacturer warranty. Warranty periods vary by driver model — check the individual product listing for specific terms. For warranty claims or driver fault diagnosis, contact our team on 01952 370008 or email sales@ukledlights.co.uk with your order number and a description of the fault.
Can I use one large driver for my entire house instead of separate drivers per room?
-
Technically possible, but not recommended. A single driver creates a single point of failure — if it fails, every room goes dark. Separate drivers per room or zone allow independent control, simpler fault diagnosis, and easier replacement. Most professional installers in 2026 specify one driver per zone as best practice for residential projects.
Do I need an electrician to install an LED driver?
-
It depends on the connection method. If using a driver with a UK 3-pin plug, no electrician is needed — plug it into a standard 13A socket and connect the DC output to your strip. If hardwiring the driver directly to the mains supply, a qualified electrician or competent person should carry out the work under Part P of the Building Regulations (England and Wales). This is a legal requirement for new circuits in domestic properties.
What is the difference between a plug-in driver and a hardwire driver?
-
A plug-in driver has a pre-fitted UK 3-pin plug that connects to a standard 13A socket outlet — no mains wiring required. It is the simplest option for homeowner-installed projects and non-permanent setups.
-
A hardwire driver has screw terminals on the mains input side for direct connection to the fixed wiring of the building. It provides a neater, permanent installation with no visible plug or trailing mains cable, but requires an electrician for the mains connection.
Can I use a 24V LED driver for outdoor garden lighting?
-
Yes, provided the driver is rated IP67 for outdoor use. An IP20 indoor driver mounted outside will fail after the first rain ingress event.
-
Size the driver to at least 120% of your total outdoor strip wattage and mount it in a ventilated, sheltered enclosure even with IP67 protection.
-
For garden runs over 20 metres, consider a 48V driver — voltage drop occurs at half the rate of 24V over the same distance and wattage.
What driver do I need for RGB or RGBW LED strip?
-
A non-dimmable constant-voltage driver is required. RGB and RGBW strip must never be connected to a Triac dimmable driver.
-
The driver provides steady 24V DC to a separate RGB or RGBW controller that handles all colour mixing, dimming, and effects.
-
Using a dimmable driver with colour-changing strip causes visible flicker, erratic colour behaviour, and premature failure of both the controller and the strip.
How do I know if my existing dimmer is leading-edge or trailing-edge?
-
Check the dimmer faceplate or packaging for its type designation. Leading-edge dimmers are often labelled as "TRIAC" or "leading-edge," while trailing-edge units are labelled "ELV" or "trailing-edge."
-
If unlabelled, test behaviour: Leading-edge dimmers typically produce a hard click when switched on. Trailing-edge dimmers have a softer, quieter action.
-
Replacing a leading-edge dimmer with a trailing-edge model typically costs approximately fifteen pounds and typically resolves the flicker that LED drivers experience with leading-edge types.
Can I power LED neon flex from the same driver as LED strip?
-
Yes, provided both products operate on the same voltage and the total wattage of all connected products does not exceed the driver rating minus 20% headroom.
-
Wire each product in parallel back to the driver output — never in series.
-
If one product is dimmable and the other uses a controller, they require separate drivers to avoid signal interference.
What safety certifications should I look for on an LED driver?
-
CE and UKCA marking are the minimum legal requirements for LED drivers sold in the UK market in 2026.
-
For SELV classification under BS7671, the driver must be a safety-rated, isolated unit — SELV is a system classification requiring correct installation, not just a voltage rating.
-
IP67 certification is verified through third-party testing and confirms the driver enclosure is dust-tight and withstands temporary immersion.
Why does my LED driver shut down after running for a few hours?
-
Thermal protection is the most likely cause. The driver overheats and shuts down to prevent internal damage, then restarts once it cools.
-
Check for overloading: Total strip wattage must not exceed 80% of the driver rated capacity for sustained use.
-
Check ventilation: Ensure at least 50mm clearance around all sides of the driver and verify it is not enclosed in an airtight space or covered by insulation.
-
If the driver is correctly sized and ventilated but still shuts down, it may be faulty — contact 01952 370008 for diagnosis.
Can I use a smart plug or timer with an LED driver?
-
Yes — a smart plug or mechanical timer on the mains side of a non-dimmable driver provides simple on/off scheduling without any additional controllers.
-
Do not use a smart plug with a Triac dimmable driver if the plug has built-in dimming — it may conflict with the driver's dimming circuit.
-
For brightness and colour control, a dedicated WiFi LED controller on the 24V side offers far more functionality than a mains-side timer.
Is it safe to run two LED drivers from the same mains spur?
-
Yes, provided the total combined wattage of both drivers does not exceed the rating of the fused spur. A standard UK fused connection unit with a 3A fuse supports up to approximately 690W total load.
-
For larger multi-driver installations, use a higher-rated fuse or dedicated MCB at the consumer unit, sized by a qualified electrician.
-
Each driver should have its own inline fuse or switch for independent isolation during servicing.
Last reviewed: March 2026 — UK LED Lights technical team, Telford, Shropshire. Specifications current as of 2026.
UK LED specialist, Telford, Shropshire · 01952 370008 · Free UK delivery


 From £38.85Unit price /Unavailable