Pick the wrong IP rating for a bathroom and you will be replacing failed strip within months. UK LED Lights stocks a purpose-built bathroom LED strip lights range — IP67 and IP68 rated, 24V and 48V, COB dot-free and classic SMD — designed to handle the steam, humidity, and direct water exposure that destroy standard indoor strip. Every product ships from our Telford warehouse with free UK delivery, and our technical team will walk you through BS7671 zone requirements before you order.
Our 2026 bathroom range includes IP67 silicone-sealed COB strip in warm white 2700K, natural white 4000K, and cool white 6000K, plus IP68 fully submersible strip for shower floors and bath surrounds, and waterproof connectors and sealed aluminium profiles to complete the installation. Call 01952 370008 or email sales@ukledlights.co.uk for project-specific advice.
IP67 & IP68 · 24V & 48V · COB Dot-Free · Warm 2700K · Natural 4000K · Cool 6000K · RGB · RGBW · Waterproof Connectors · Sealed Profiles · BS7671 Zone Compliant · CRI90+ · Free UK Delivery
Quick decision — which bathroom LED strip light do you need?
-
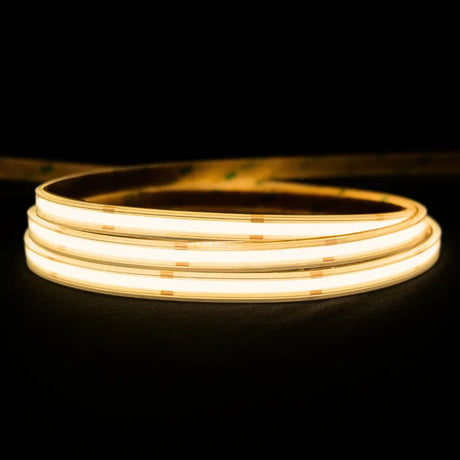
Behind-mirror cove lighting with zero dot reflection: 24V COB strip in natural white 4000K (CRI90+) inside a sealed aluminium profile with silicone end caps — the professional standard for bathroom mirrors in 2026.
-
Shower niche or enclosure wall (Zone 1): IP67 COB strip in warm white 2700K, wired to a trailing-edge dimmer for adjustable spa-style ambience.
-
Bath surround or plinth kick-light: IP67 strip recessed into a profile — creates a floating effect underneath freestanding baths.
-
Wet room floor perimeter or shower tray (Zone 0): IP68 fully submersible strip — the only rating suitable for continuous water contact.
-
Vanity unit under-lighting: IP67 strip in natural white 4000K for accurate colour rendering during grooming tasks.
-
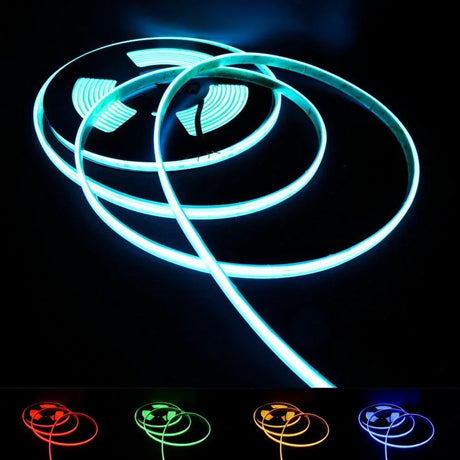
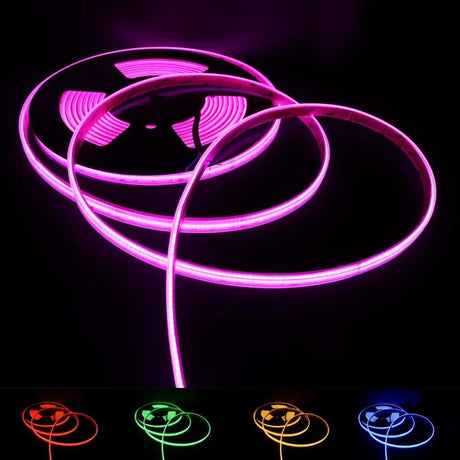
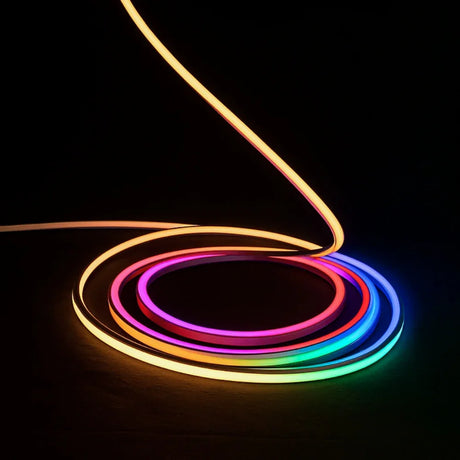
Colour-changing mood lighting: IP67 RGB COB strip with a dedicated controller — remember RGB requires a non-dimmable constant-voltage driver, not a standard dimmer.
Who bathroom LED strip lights are for: Homeowners renovating or upgrading bathrooms who want layered, spa-quality lighting. Interior designers specifying cove, niche, and feature lighting for residential and hospitality bathroom projects. Electricians and bathroom fitters who need a reliable IP67/IP68 supplier with technical support and same-week dispatch. Property developers fitting en-suites where lighting quality directly affects perceived value.
Who bathroom LED strip lights are NOT for: If you need a basic ceiling light and nothing else, a standard IP65 bathroom downlight is simpler and cheaper. If your bathroom has no zones near water (a cloakroom with only a basin, for example), IP20 strip may be adequate — though we still recommend IP67 in any room with a shower, bath, or persistent steam. And if you want a thick neon-style glow line around a mirror or bath, our LED neon flex range is designed specifically for that visible-strip aesthetic.
Common buying mistakes to avoid in bathroom LED strip projects:
-
Choosing IP65 for bathroom wet zones: IP65 handles surface splashes only. It is not rated for the sustained humidity, direct spray, and condensation cycling inside a UK bathroom. Under BS7671 guidance, IP67 is the minimum recommendation for Zone 1, and IP68 is required for Zone 0 (inside the bath or shower tray).
-
Placing the driver inside the bathroom: LED drivers generate heat and are rarely rated above IP20. Mount the driver in a dry, ventilated location outside the bathroom — in the loft, an adjacent cupboard, or under the floorboards in an accessible enclosure. This also makes future servicing simple.
-
Skipping Part P compliance: Bathroom electrical work in England and Wales falls under Building Regulations Part P. New lighting circuits in bathrooms must be either installed by a registered competent person or inspected and signed off by Building Control. Ignoring this creates a legal liability, invalidates home insurance, and causes problems at property sale.
-
Using a dimmable driver with RGB or RGBW bathroom strip: RGB and RGBW strip requires a non-dimmable constant-voltage driver paired with a dedicated RGB controller. Dimmable drivers cause colour shifting, visible flicker, and premature LED failure.
-
Powering strip while still on the reel: Coiled strip cannot dissipate heat. The adhesive fails, LEDs overheat, and in enclosed bathrooms with limited ventilation, the concentrated heat poses a fire risk. Always uncoil and mount before connecting power.
- What IP rating do bathroom LED strip lights actually need in 2026?
- How do BS7671 bathroom zones affect LED strip selection?
- Which colour temperature works best in a bathroom?
- Why is COB strip the best choice for bathroom mirrors?
- How do you install bathroom LED strip lights step by step?
- What driver and wiring setup does a bathroom LED strip need?
- Can you dim LED strip lights in a bathroom without flicker?
- What profiles and accessories complete a waterproof bathroom installation?
- Where do bathroom LED strip lights work best — location by location?
- Why do UK bathrooms fail with the wrong LED strip — and how do you avoid it?
What IP rating do bathroom LED strip lights actually need in 2026?
Bathroom LED strip lights need a minimum IP67 rating in any zone exposed to direct water, steam, or sustained humidity. IP65 — despite being marketed as "waterproof" by many UK retailers — only resists surface splashes and degrades within months in a bathroom environment. For Zone 0 areas inside the bath or shower tray, IP68 (continuous submersion rated) is the only compliant choice under current BS7671 guidance.
The confusion around IP ratings costs UK homeowners more money than almost any other LED purchasing mistake. Retailers label IP65 as "bathroom suitable" because it technically resists water jets from one direction. What they do not mention is that a bathroom produces persistent condensation, rising steam, and temperature cycling that break down the polyurethane coating on IP65 strip within six to twelve months. The silicone encapsulation on IP67 strip is a fundamentally different material — it remains flexible, watertight, and UV-stable through years of daily shower use.
| IP Rating |
Protection Level |
Bathroom Suitability |
Typical Lifespan in Bathroom |
| IP20 |
No moisture protection |
Not suitable — corrodes within weeks in humid rooms |
1–3 months |
| IP65 |
Surface splash resistance |
Inadequate — coating degrades in steam and condensation cycling |
6–12 months |
| IP67 |
Temporary immersion, full seal |
Recommended minimum for Zone 1 and Zone 2 |
5–8+ years |
| IP68 |
Continuous submersion |
Required for Zone 0, recommended for wet rooms and steam rooms |
8–10+ years |
For every bathroom installation in 2026, our standard recommendation is IP67 as the minimum across all zones — even Zone 2 areas 0.6 metres from the shower. The price difference between IP65 and IP67 strip is typically under two pounds per metre. The cost of stripping a failed IP65 installation off tiled walls and reinstalling IP67 is considerably more. Call 01952 370008 to discuss your specific bathroom layout.
How do BS7671 bathroom zones affect LED strip selection?
BS7671 (the 18th Edition Wiring Regulations) divides every UK bathroom into three zones — Zone 0 inside the bath or shower, Zone 1 above the bath or shower up to 2.25 metres, and Zone 2 extending 0.6 metres beyond Zone 1. Each zone sets minimum IP rating and voltage requirements that directly determine which LED strip products are compliant and which are not.
Since the 17th Edition removed Zone 3, any area outside Zone 2 follows general BS7671 wiring rules — but in practice, persistent steam means IP67 strip still outperforms unrated alternatives even outside the defined zones. Here is the breakdown every bathroom fitter and homeowner needs:
-
Zone 0 (inside bath or shower tray): Maximum 12V SELV. IP68 minimum. LED strip must be supplied from a safety-rated, isolated transformer. Few bathroom strip installations require Zone 0 placement, but shower tray perimeter lighting and recessed bath floor lights fall into this category.
-
Zone 1 (above bath/shower to 2.25m): IP67 minimum recommended. SELV or 240V with 30mA RCD protection. This is where the majority of bathroom strip is installed — shower niches, above-bath coves, and enclosure walls. 24V SELV is the standard safe choice in 2026.
-
Zone 2 (0.6m beyond Zone 1): IP44 minimum per regulations, but IP67 is strongly recommended given bathroom humidity. Includes the 60cm radius around any tap or basin. Vanity mirror lighting and beside-basin accent strips typically fall here.
-
Outside zones: No specific IP requirement under BS7671, but bathroom steam migrates throughout the room. We recommend IP67 for any permanent bathroom installation regardless of zone classification.
SELV voltage note: 24V DC falls within the SELV voltage threshold under BS7671 (120V DC ripple-free maximum), provided it is supplied from a suitably isolated, safety-rated driver. SELV is a system classification requiring correct installation — not just a voltage number. A 24V driver that is not safety-rated does not automatically qualify as SELV, so always verify the driver specification before installation.
Which colour temperature works best in a bathroom?
Warm white 2700K creates a relaxing, spa-style atmosphere ideal for evening baths and unwinding. Natural white 4000K delivers accurate colour rendering essential for makeup application, shaving, and grooming. Most well-designed UK bathrooms in 2026 combine both — warm white for ambient cove lighting and natural white at the mirror — using separate circuits or tuneable white strip.
Colour temperature affects how your skin, tiles, and fixtures appear under the light. The wrong choice makes an expensive bathroom renovation look flat or clinical. Here is what each option delivers in practice:
-
2700K warm white: The closest LED equivalent to a warm incandescent glow. Flattering on skin tones, relaxing on the eye, and the go-to choice for bath surrounds, shower niches, and plinth kick-lights where the goal is atmosphere. Particularly effective in bathrooms with natural stone, wood-effect, or warm-toned tiles.
-
3000K warm white: Marginally brighter than 2700K with a slightly less yellow cast. A practical compromise if you want warmth without the "candlelight" feel. Popular in en-suites and family bathrooms.
-
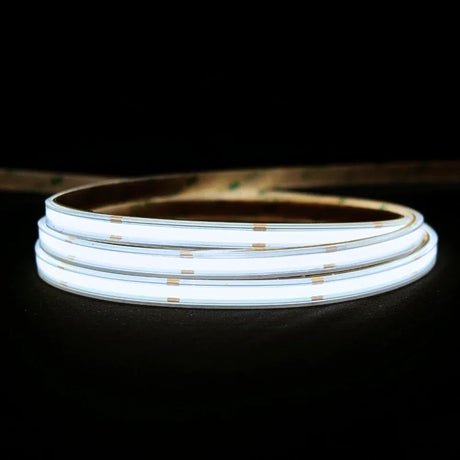
4000K natural white: Neutral daylight-balanced light with no warm or cool bias. The professional recommendation for mirror and vanity lighting in 2026 because it renders colours accurately — critical for applying makeup, matching clothing, and medical tasks like wound care. Pair with CRI90+ strip for the most accurate results.
-
5000K–6000K cool white: Clean, clinical appearance. Used in commercial washrooms and healthcare facilities where maximum visibility is the priority. Rarely suitable for residential bathrooms — makes most UK tile colours and skin tones look harsh and unflattering.
| Colour Temperature |
Bathroom Application |
Mood |
CRI Recommendation |
| 2700K warm white |
Bath surround, shower niche, plinth |
Relaxed, spa-like |
CRI80+ adequate |
| 3000K warm white |
General ambient, ceiling cove |
Warm and balanced |
CRI80+ adequate |
| 4000K natural white |
Mirror, vanity, grooming zone |
Neutral, accurate |
CRI90+ recommended |
| 5000K–6000K cool white |
Commercial washrooms only |
Clinical, bright |
CRI90+ |
If you are fitting one circuit on a budget, 3000K is among the safest single-colour choices for most residential UK bathrooms. For the best result, run two separate circuits — warm white ambient and natural white at the mirror — each on its own dimmer. Email sales@ukledlights.co.uk for wiring layout advice.
Why is COB strip the best choice for bathroom mirrors?
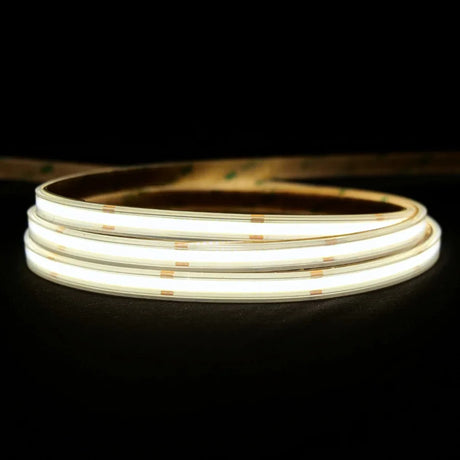
COB LED strip produces a completely smooth, dot-free light output that significantly reduces the individual LED reflections visible with SMD strip in mirrors and polished tiles. In a bathroom — where mirrors, glass shower screens, chrome fittings, and glazed tiles reflect every light source — COB strip helps prevent the dotted glare pattern that makes SMD installations look unfinished and distracting.
Mount any standard SMD 5050 strip behind a bathroom mirror and look at the reflection in the glass. You will see a row of distinct bright dots separated by darker gaps. Mount COB strip in the same position and the reflection becomes a single, smooth band of even light — the difference between a premium installation and a budget afterthought.
-
Mirror cove lighting: COB strip mounted in a profile behind or above the mirror provides shadow-free, even illumination across the face — essential for shaving and makeup. Natural white 4000K with CRI90+ is the professional specification for this application in 2026.
-
Glass shower screens: Shower screens act as partial mirrors from certain angles. SMD dots become visible through the glass, particularly at night. COB strip largely eliminates this.
-
Chrome fixtures and taps: Every chrome surface in a bathroom picks up and reflects individual LED dots. The more reflective surfaces in the room, the greater the visual benefit of switching from SMD to COB.
-
Glazed tile splashbacks: High-gloss and polished porcelain tiles amplify dot visibility. COB strip helps ensure only smooth light washes across the tile surface.
The price premium for COB over SMD strip is typically 30–40% per metre. In a bathroom — where almost every surface is reflective — that premium addresses the single most common visual complaint about LED strip lighting. Browse the full COB LED strip range or call 01952 370008 for mirror lighting recommendations.
How do you install bathroom LED strip lights step by step?
Bathroom LED strip installation requires planning the driver location, confirming BS7671 zone compliance, preparing sealed profiles, running low-voltage cable, and waterproofing every connection point. The process takes approximately 2–4 hours for a single-zone bathroom strip run when the electrical first-fix is already in place, and must comply with Part P Building Regulations in England and Wales.
Step-by-step bathroom LED strip installation
-
Plan the lighting layout and identify zones: Measure every run length. Mark each location on a bathroom plan and classify it as Zone 0, Zone 1, or Zone 2 per BS7671. This determines the minimum IP rating and voltage for each run. Photograph your layout and measurements before purchasing — our technical team at 01952 370008 can verify your specification free of charge.
-
Select and mount the driver in a dry location: Install the LED driver outside the bathroom in a ventilated, accessible enclosure — loft space, adjacent airing cupboard, or under-floor void. Size the driver to at least 120% of total strip wattage. A 5-metre run of 14.4W/m strip (72W total) needs a minimum 90W driver. Use a safety-rated, SELV-compliant driver for 24V bathroom circuits.
-
Install sealed aluminium profiles: Cut aluminium profiles to length using a fine-tooth hacksaw or mitre saw. Secure to the mounting surface using stainless steel brackets or adhesive rated for humid environments. Fit silicone end caps to both ends of each profile before inserting the strip — this prevents moisture ingress from behind. In 2026, sealed profiles with integrated gaskets are the professional standard for bathroom work.
-
Run low-voltage cable from driver to strip location: Use 2-core cable rated for the current draw of your strip run. For 24V strip at 14.4W/m over 5 metres (72W, drawing 3A), 0.75mm2 cable is adequate for runs under 10 metres. Run cable through conduit where it passes through walls, and seal every penetration point with silicone.
-
Mount the LED strip inside the profile: Uncoil the strip fully on a clean surface — never power strip while coiled. Clean the profile channel with isopropyl alcohol, then press the strip firmly into the channel. The 3M adhesive bonds best at room temperature. For IP67 strip, the silicone jacket adds thickness — confirm the strip fits your chosen profile width before ordering.
-
Make waterproof connections: Use IP67-rated waterproof connectors at every join. Solder joints must be sealed with adhesive-lined heat shrink tubing and a secondary layer of self-amalgamating tape. Every connection point is a potential failure path — seal each one as if it will sit underwater.
-
Wire in parallel for consistent brightness: If running multiple strip lengths from one driver, wire them in parallel — not in series. Series wiring multiplies voltage drop, causing the furthest strip to appear noticeably dimmer. Parallel wiring helps ensure each run receives the full driver voltage.
-
Connect dimmer or controller: For single colour strip, install a trailing-edge dimmer on the mains side of the driver, or a PWM dimmer on the 24V output side. For RGB or RGBW strip, connect a dedicated controller between the driver and the strip — never use a mains dimmer with colour-changing products. Trailing-edge dimmers typically cost approximately fifteen pounds and eliminate the flicker that leading-edge dimmers cause with LED drivers.
-
Test before final sealing: Power on and check every run for consistent brightness, correct colour temperature, and smooth dimming response. Walk the room and inspect from multiple angles. Look for any flickering at low dimmer levels. Fix any issues now — once profiles are sealed and tiled around, correction is disruptive and expensive.
-
Commission and comply with Part P: In England and Wales, new bathroom electrical circuits fall under Building Regulations Part P. The installation must be carried out by a registered competent person (such as an electrician registered with NICEIC, NAPIT, or ELECSA) or notified to Building Control for inspection. Ensure all RCD protection is tested and the installation certificate is filed.
Need help specifying the right products for your bathroom project? Call 01952 370008 with your room dimensions and we will provide a full component list and wiring recommendation.
What driver and wiring setup does a bathroom LED strip need?
Bathroom LED strip runs on a constant-voltage driver — typically 24V for residential bathrooms — sized to at least 120% of the total strip wattage. The driver must be mounted outside the bathroom in a dry, ventilated location, supplied from a circuit with 30mA RCD protection, and must be a safety-rated SELV-compliant unit to meet BS7671 requirements for bathroom zones.
-
Driver sizing formula: Total strip length in metres multiplied by watts per metre, then multiplied by 1.2 for headroom. Example: 8 metres of 14.4W/m strip = 115.2W total, requiring a minimum 138W driver. Round up to the next available size — in this case, a 150W unit.
-
Voltage selection: 24V is the standard for bathroom installations in 2026 — safe, widely available, and compatible with the broadest range of waterproof strip products. 48V offers reduced voltage drop over longer runs (voltage drop occurs at half the rate of 24V at the same wattage), making it practical for large wet rooms or commercial washrooms with runs exceeding 15 metres.
-
RCD protection: BS7671 requires 30mA RCD protection for all circuits supplying equipment in bathroom zones. Verify this is present at the consumer unit before commissioning.
-
Cable sizing: Use the appropriate 2-core cable for the current draw. Undersized cable creates heat build-up and measurable voltage drop, particularly over longer runs through walls and ceilings. For any run exceeding 10 metres from driver to strip, consult an electrician or contact our team at sales@ukledlights.co.uk for cable sizing guidance.
-
Wiring topology: Always wire multiple strip runs in parallel back to the driver. Series wiring multiplies voltage drop across each consecutive run, resulting in uneven brightness that is particularly noticeable in a bathroom where all runs are visible simultaneously.
Browse the full LED driver range or call 01952 370008 for a matched driver recommendation based on your strip selection and run lengths.
Can you dim LED strip lights in a bathroom without flicker?
Yes — bathroom LED strip dims smoothly from 100% to approximately 1% when paired with a trailing-edge dimmer and a compatible constant-voltage driver. Flicker in dimmed bathroom strip is almost always caused by a leading-edge dimmer, an incompatible driver, or an overloaded dimmer circuit — not by the strip itself. Replacing a leading-edge dimmer with a trailing-edge unit typically costs around fifteen pounds and typically resolves the problem.
-
Trailing-edge (ELV) dimmers: The correct type for LED drivers. Trailing-edge dimmers switch off at the falling edge of the AC waveform, producing a smooth signal that LED drivers respond to cleanly. This is the only dimmer type we recommend for bathroom LED strip in 2026.
-
Leading-edge (MLV/TRIAC) dimmers: Designed for resistive incandescent loads. They switch at the rising edge of the waveform, producing a chopped signal that most LED drivers interpret inconsistently. The result is visible flicker — particularly at low brightness levels, which is exactly where bathroom ambient lighting spends most of its time.
-
PWM dimming on the 24V side: An alternative approach that places the dimmer between the driver and the strip on the low-voltage circuit. PWM dimming adjusts brightness by rapidly switching the LED on and off at a frequency above human perception (typically 1,000Hz or higher). This avoids any mains-side dimmer compatibility issues entirely.
-
RGB and RGBW — no dimmer, use a controller: Colour-changing strip must not be connected to any mains dimmer. Dimming and colour control are handled by a dedicated RGB or RGBW controller operating on the 24V circuit. The mains supply to the driver must be non-dimmable.
Dimmed bathroom lighting is not optional for most homeowners — it is the primary reason for choosing LED strip over fixed ceiling lights. Getting the dimmer type right is a fifteen-pound decision that determines whether the installation feels professional or frustrating. Contact 01952 370008 for dimmer compatibility confirmation.
What profiles and accessories complete a waterproof bathroom installation?
A waterproof bathroom LED strip installation requires sealed aluminium profiles with milky diffuser covers, silicone end caps for both ends of every profile, IP67 or IP68 rated connectors at every join, adhesive-lined heat shrink tubing for soldered connections, and stainless steel mounting brackets or humidity-rated adhesive. Skipping any one of these components is the most common cause of premature failure in bathroom strip lighting.
-
Sealed aluminium profiles: Profiles serve three purposes in a bathroom — heat dissipation (extending strip lifespan by reducing operating temperature), moisture protection (enclosing the strip in a secondary barrier), and light diffusion (eliminating glare from a smooth milky cover). Surface-mount, recessed, and corner profiles are all available for bathroom applications. Browse the full profile range.
-
Silicone end caps: Both ends of every profile must be capped. Even if one end is against a wall, moisture migrates through the smallest gap. Use end caps with a cable exit hole where the feed wire enters, sealed with a bead of silicone.
-
IP67/IP68 waterproof connectors: Standard push-fit IP20 connectors corrode within weeks in a bathroom. Use IP67-rated screw-lock or compression connectors on every connection. UK LED Lights stocks matched connectors for 8mm, 10mm, and 12mm strip widths in both IP67 and IP68 ratings.
-
Adhesive-lined heat shrink: Soldered joints must be double-sealed — first with adhesive-lined heat shrink (which melts to create a watertight bond), then optionally with self-amalgamating tape for belt-and-braces protection in Zone 1 locations.
-
Stainless steel brackets: Standard zinc-plated brackets rust in humid bathrooms within twelve to eighteen months. Use stainless steel or plastic mounting clips for any visible bracket inside the bathroom.
Where do bathroom LED strip lights work best — location by location?
The most effective bathroom LED strip positions are behind or around mirrors for grooming light, inside shower niches for accent and task lighting, under freestanding baths for a floating plinth effect, along ceiling coves for soft ambient fill, and under vanity units for low-level night lighting. Each location requires a specific IP rating, colour temperature, and profile type to perform correctly.
-
Behind-mirror or mirror perimeter: The single highest-impact LED strip position in any bathroom. Natural white 4000K COB strip in a slim profile, positioned to wash light evenly across the face without shadow. CRI90+ is strongly recommended here — it helps ensure accurate skin-tone and colour rendering for makeup and grooming. Zone 2 in most layouts, IP67 recommended.
-
Shower niche: Recessed strip inside a tiled shower niche creates a practical light source and a design focal point. Warm white 2700K sets a spa-like tone. IP67 minimum — this is Zone 1 territory in most configurations. Seal the profile ends thoroughly as shower niches concentrate water runoff.
-
Under freestanding bath: Strip mounted in a profile underneath a freestanding bath creates the illusion of the bath floating above the floor. Warm white 2700K or 3000K works best. IP67 minimum — the floor zone around a bath accumulates standing water during use.
-
Ceiling cove: LED strip recessed into a shadow-gap or coving around the bathroom ceiling provides ambient fill light that reduces the clinical feel of overhead spots. 3000K warm white on a dimmer lets you shift from full task brightness to relaxed evening levels.
-
Vanity unit under-lighting: Low-level strip under a wall-hung vanity provides orientation lighting for night-time bathroom visits without full room illumination. 2700K at low dimmer output — just enough to navigate safely. IP67 protects against splash from the basin above.
-
Bath surround tiling reveal: Strip recessed into a shadow gap in the tiling around a built-in bath highlights the architectural lines of the installation. Warm white 2700K–3000K. IP67 minimum, IP68 where the reveal is within Zone 0.
-
Towel rack or heated rail accent: Strip mounted behind or above a towel rail creates a subtle backlit effect. Zone 2 in most positions, IP67 recommended. Warm white provides a welcoming accent that draws the eye to warm towels — a small detail that lifts the entire room.
Why do UK bathrooms fail with the wrong LED strip — and how do you avoid it?
The three most common UK bathroom LED strip failures are using IP65-rated strip that degrades in persistent humidity, mounting strip directly onto bare metal surfaces that cause short circuits, and failing to seal connection points against moisture ingress. Each failure is preventable with the correct product selection, proper sealing, and an understanding of the conditions inside a working bathroom.
-
IP65 degradation cycle: The polyurethane coating on IP65 strip absorbs moisture through daily steam exposure. Over weeks, the coating clouds, adhesive lifts, and corrosion begins at the solder points. By six to twelve months, sections fail. IP67 silicone-sealed strip is impervious to this cycle because the encapsulation material does not absorb moisture.
-
Bare metal mounting: Bathroom walls sometimes use metal framing, metal-backed tiles, or exposed copper pipe runs. Mounting LED strip directly onto any bare metal surface without insulation creates a short-circuit risk across the copper pads on the back of the strip. Always use an aluminium profile with anodised finish, or apply an insulating barrier.
-
Connection point failure: The strip itself is typically the last component to fail. The weak link in every bathroom installation is the connection — where the strip meets the feed wire, where two strips join, or where a connector bridges a corner. Every connection must be waterproofed to at least the same IP rating as the strip, or it becomes the entry point for moisture.
-
Condensation inside profiles: In bathrooms with poor ventilation, condensation can form inside sealed profiles during temperature cycling (hot shower followed by cold air). Silicone end caps with a small drainage weep hole at the lowest point prevent trapped moisture from pooling around the strip.
-
Wrong driver for the environment: An IP20 driver mounted inside a bathroom fails. A driver without SELV certification installed in a zone circuit creates a compliance issue. Plan the driver location as carefully as the strip location — it is equally critical to a lasting installation.
-
Every bathroom product we sell meets BS7671 zone requirements — we do not stock IP65 for wet areas regardless of what competitors claim is sufficient.
- Our technical team has specified bathroom LED strip for hotel chains, care homes, and disability-compliant wet rooms.
Every product in the UK LED Lights bathroom range is rated IP67 or IP68. We do not sell IP65 strip for bathroom applications because the failure rate is unacceptable. Call 01952 370008 or email sales@ukledlights.co.uk to discuss your project — we would rather talk you through the right specification upfront than deal with a warranty claim later.
Why UK LED Lights for your bathroom LED strip project?
-
Bathroom-rated stock, not relabelled indoor strip: Every strip in this collection is manufactured to IP67 or IP68 specification — silicone-sealed, not polyurethane-coated. We do not sell IP65 strip for bathroom use because it does not last.
-
Technical support from people who have fitted these products: Call 01952 370008 (Monday to Friday, 9am–5pm) and speak to our Telford-based team. We will check your bathroom zones, specify the correct IP rating for each run, recommend driver sizing, and confirm Part P requirements — before you spend a penny.
-
Matched accessories in stock: Waterproof IP67 and IP68 connectors, sealed aluminium profiles, silicone end caps, and correctly rated drivers — all from one supplier, all compatible, all dispatched from Telford with free UK delivery.
-
No minimum order: Fitting one shower niche? Order a single metre of strip and the connectors you need. No forced bulk packs, no minimum spend thresholds.
-
UK stock, UK support, UK company: UK LED Lights Ltd (Company No: 12301805), Unit D4, Stafford Park 4, Telford, Shropshire, TF3 3BA. Stock held in Telford. Orders dispatched same or next working day.
Ready to order or need project advice?
What are the most common questions about bathroom LED strip lights?
Q: Is IP65 LED strip safe for a bathroom?
- IP65 resists surface splashes only and is not adequate for bathroom wet zones under BS7671 guidance. The polyurethane coating degrades in persistent humidity, leading to adhesive failure and corrosion within six to twelve months. IP67 is the minimum we recommend for any bathroom installation in 2026.
Q: Can I install LED strip lights in a shower?
- Yes — use IP67 rated strip in the shower walls and niche (Zone 1), and IP68 rated strip if the installation is at floor level inside the shower tray (Zone 0). All connections must use waterproof IP67 or IP68 connectors, and the circuit must have 30mA RCD protection.
Q: Do I need an electrician to fit LED strip lights in a bathroom?
- In England and Wales, new electrical circuits in bathrooms fall under Part P of the Building Regulations. The work must be carried out by a registered competent person (NICEIC, NAPIT, or ELECSA registered) or notified to your local Building Control for inspection and sign-off. Scotland and Northern Ireland have equivalent regulations.
Q: What colour temperature is best for a bathroom mirror?
- Natural white 4000K with CRI90+ is the professional standard for mirror and vanity lighting. It provides accurate colour rendering for makeup, grooming, and skincare without the yellow cast of warm white or the harsh clinical feel of cool white.
Q: Where should the LED driver be located in a bathroom installation?
- Outside the bathroom in a dry, ventilated, accessible location — loft space, airing cupboard, or under-floor enclosure. Most LED drivers are rated IP20 and will fail if exposed to bathroom humidity. Accessible mounting also makes future driver replacement quick and easy.
Q: How do I prevent LED strip flickering on a dimmer in the bathroom?
- Use a trailing-edge dimmer — not a leading-edge type. Leading-edge dimmers are designed for incandescent bulbs and produce a signal that causes visible flicker in LED drivers, particularly at low brightness. Replacing a leading-edge dimmer with a trailing-edge unit typically costs around fifteen pounds and typically resolves the issue.
Q: Can I use RGB LED strip in a bathroom?
- Yes — IP67 or IP68 rated RGB strip works well for mood lighting in bathrooms. Remember that RGB strip requires a non-dimmable constant-voltage driver and a dedicated RGB controller. Standard dimmers cause colour shifting and flicker with RGB products. Also note that RGB alone cannot produce a clean warm white — if you need both colours and true white, choose RGBW strip with a dedicated white channel.
Q: What is the difference between IP67 and IP68 for bathroom use?
- IP67 is rated for temporary immersion (up to 1 metre for 30 minutes) and resists sustained humidity, steam, and direct water spray. IP68 is rated for continuous submersion and is required for any installation inside the bath or shower tray (Zone 0). For shower walls, niches, and most bathroom positions, IP67 is sufficient. For floor-level or underwater applications, IP68 is the correct choice.
Q: How long do waterproof LED strip lights last in a bathroom?
- IP67 silicone-sealed LED strip typically lasts 5–8 years or more in a bathroom environment with daily use, provided the driver is correctly sized, connections are properly waterproofed, and the strip is mounted in a sealed aluminium profile. IP68 strip in fully submerged applications has a similar lifespan. IP65 strip, by contrast, commonly fails within six to twelve months in bathroom conditions.
Q: Does UK LED Lights offer free delivery on bathroom LED strip?
- Yes — all UK LED Lights orders ship with free UK delivery from our Telford warehouse. Orders placed before the dispatch cut-off are typically sent same or next working day. Contact 01952 370008 or email sales@ukledlights.co.uk for delivery timeframes to your postcode.
Q: Can I use a trailing-edge dimmer for bathroom LED strip?
- Yes — a trailing-edge dimmer paired with a Triac dimmable driver provides smooth, flicker-free dimming for single-colour bathroom strip. Leading-edge dimmers cause visible flicker at low brightness levels. Replacing a leading-edge unit with a trailing-edge model costs approximately fifteen pounds.
Q: Is 48V LED strip suitable for bathrooms?
- Yes — 48V DC falls within the SELV voltage threshold under BS7671 (120V DC ripple-free maximum), provided it is supplied from a suitably isolated, safety-rated driver. 48V offers reduced voltage drop for large wet rooms or commercial washrooms with runs exceeding 15 metres.
Q: Can I mount bathroom LED strip on bare metal surfaces?
- Never mount LED strip directly on bare uninsulated metal. The PCB underside has exposed copper traces that will short-circuit against conductive surfaces. Always use an aluminium profile with an anodised finish or apply an insulating barrier between the strip and any bare metal.
Q: What happens if I power bathroom LED strip while it is coiled?
- Heat builds up rapidly in coiled strip because air cannot circulate. The adhesive softens, LEDs overheat, and permanent damage can occur within minutes. In enclosed bathrooms with limited ventilation, the concentrated heat poses an additional safety concern. Always uncoil and mount before powering on.
Q: Can RGBW strip produce clean warm white in a bathroom?
- Yes — RGBW strip has a dedicated white LED channel that produces accurate warm white (3000K) independently of the RGB colour channels. Standard RGB strip cannot produce clean white — it blends red, green, and blue to create a violet-tinged approximation that looks unnatural. RGBW is the correct choice for bathrooms needing both colour effects and usable white light.
Q: Do I need RCD protection for bathroom LED strip circuits?
- Yes — BS7671 requires 30mA RCD protection for all circuits supplying equipment in bathroom zones. This is a mandatory safety requirement, not optional. Verify RCD protection is present at the consumer unit before commissioning any bathroom LED installation.
Q: Can bathroom LED strip be connected to a smart home system?
- Yes — mount a WiFi or Zigbee controller outside the bathroom in a dry location, with only the low-voltage cable running to the IP67 strip inside the bathroom. This allows control via Alexa, Google Home, or other smart platforms while keeping the controller protected from moisture.
Q: What cable should I use between the driver and bathroom LED strip?
- Use 2-core cable rated for the current draw of your installation. For 24V strip at 14.4W/m over 5 metres, 0.75mm2 cable is adequate for runs under 10 metres. Run cable through conduit where it passes through walls, and seal every penetration point with silicone to prevent moisture migration.
Q: Is COB strip better than SMD strip for bathroom mirrors?
- Yes — COB strip produces a completely even, dot-free light output that eliminates the individual LED reflections visible with SMD strip in mirrors, glass shower screens, and polished tiles. The price premium for COB over SMD is typically 30-40% per metre, but in a bathroom where almost every surface is reflective, the visual improvement is substantial.
Q: Can I use IP20 strip in a cloakroom with only a basin?
- IP20 is technically permissible outside defined bathroom zones, but we recommend IP67 for any room with running water. A basin generates occasional splashing and persistent humidity that degrades IP20 strip over time. The cost difference between IP20 and IP67 is minimal compared to the cost of replacement.
Recommended setup for a 3-metre bathroom mirror cove installation
-
Strip: 24V COB natural white 4000K, IP67, 10W/m — CRI 90+ for accurate colour rendering at the mirror
-
Driver: 24V 60W triac dimmable constant voltage, mounted outside the bathroom in a dry location
-
Profile: Sealed aluminium with milky diffuser and IP-rated silicone end caps
-
Dimmer: Trailing-edge triac dimmer outside the bathroom or on an accessible panel — approximately £15
-
Total cost guide: Approximately £35-50 for strip + £20-30 for driver + £15-25 for profile per metre + £15 for dimmer
Bathroom zones, ceiling heights, and mirror sizes vary on every project — IP rating and driver wattage will need adjusting to match. Call 01952 370008 or email sales@ukledlights.co.uk for free bathroom lighting advice.
When should you choose a different product instead of bathroom LED strip?
Knowing what NOT to buy is just as valuable as knowing what to buy. Here are the bathroom scenarios where LED strip is not the best option.
-
You need a single bright ceiling light and nothing else: An IP65-rated LED bathroom downlight or flush mount is simpler and cheaper for basic bathroom illumination.
-
You want a bold neon-style glow around a mirror or bath: LED neon flex in IP67 silicone is designed for that visible-strip aesthetic, producing a thicker rounded glow line that strip in a profile cannot replicate.
-
Your bathroom has no zones near water (e.g. a cloakroom with basin only): Standard IP20 strip may be sufficient, saving the cost of IP67 silicone encapsulation. Always check BS7671 zone classification first.
-
You are renting and cannot make permanent modifications: Battery-powered vanity lights or plug-in options avoid any permanent wiring. LED strip installation typically involves screwing profiles and routing cables through walls.
If you are unsure whether this product suits your project, call 01952 370008 — our technical team will recommend the correct alternative if this is not the right match.
Last reviewed: March 2026 — UK LED Lights technical team, Telford, Shropshire. Specifications current as of 2026.
UK LED specialist, Telford, Shropshire · 01952 370008 · Free UK delivery